31 Days to Regaining Your Identity

September 25th, 2017

regaining-your-identity

During the month of October I will be participating in the 31 Days challenge, and the topic this year is a life-changing one: 31 Days to Regaining Your Identity. Each day I will be covering a different aspect of who we are in Christ so that we can regain what the enemy has taken away from us and live a joyful life full of purpose. Christian women should be fully grounded in our personhood as daughters of the King so that we don’t live our lives in defeat.

Don’t listen to negative talk that people say against you, even if it’s your own family members. If you have trusted Christ and made Him Lord of your life, you have been forgiven. You are loved, and you are beautiful! I am going to prove all these things to you through Scripture and personal experience by filming a short teaching video with each day’s topic, so that you can come to know who you truly are.

Imagine someone who has a huge bank account, but that person does not know that he or she is a millionaire. So they live their lives in misery, because they just don’t know what they already own. Do you realize that you have an inheritance in Christ, and you don’t have to be dead to receive it? It’s true! You get so much treasure in Christ in the here and now, and the reason we live in defeat is because of lack of understanding.

Here is the list of topics I will be addressing this month:

1. You are Accepted
2. You are Loved
3. You are Forgiven
4. You are Beautiful
5. You are Rejoiced Over
6. You are Honored
7. You are Wanted
8. You are Valuable
9. You are Full of Hope
10. You are Protected
11. You are a Citizen of Heaven
12. You are Confident
13. You are Joyful
14. You are Unique and Significant
15. You are a New Creation
16. You are an Overcomer
17. You are Gifted
18. You are Powerful Over the Enemy
19. You are Healed and Restored
20. You are Free
21. You are God’s Temple
22. You are a Light to Others
23. You are Fearless and Brave
24. You are United with Christ
25. You are a Minister of Reconciliation
26. You are Equipped and Strong
27. You are Blessed
28. You are Full of Grace
29. You are Seated with Christ
30. You are God’s Masterpiece
31. You are Complete in Christ

If you don’t want to miss any of these posts from the series “31 Days to Regaining Your Identity,” why not sign up for my free monthly newsletter below, and follow my prayer page on Facebook.

you-are-a-masterpiece


During this series, you will see artwork created by my daughter and by me, through the art course {aff} “You are a Masterpiece” by Alicia Gratehouse. If you love to do art and are discovering who you are in Christ, this is a great art course for you!
Ocean Shadow Box

September 18th, 2017

ocean-shadow-box

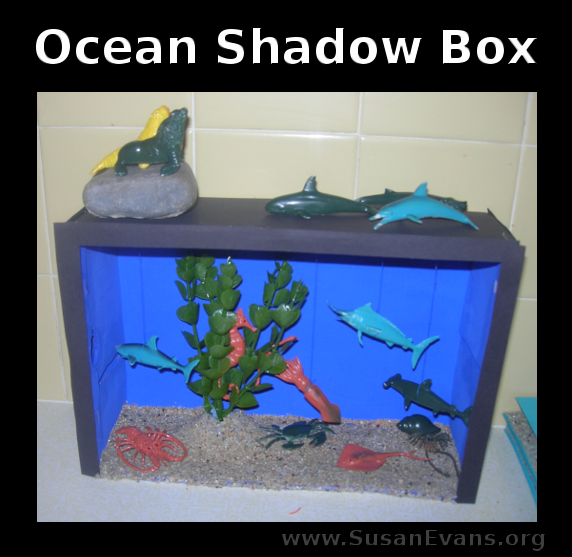
If your kids are learning about underwater sea creatures, why not make an ocean shadow box? It is super easy and will re-enforce the children’s learning about ocean creatures.

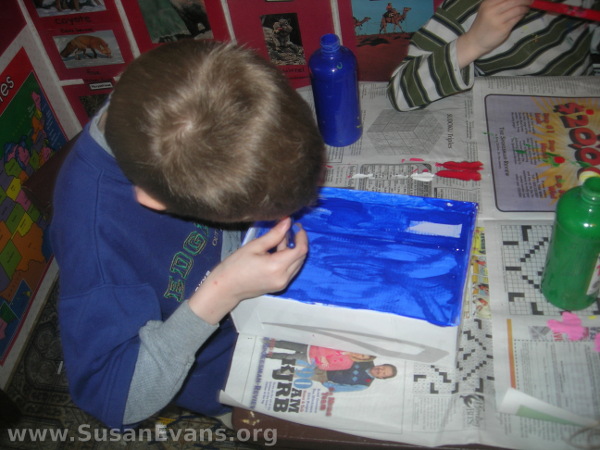
The first thing you will want to do is paint the box blue. It helps if a shoe box is a plain white color on the inside. We taped black construction paper around the outside of the box, but you could paint that black if you want.

In other shadow boxes we’ve made, we have spray painted the entire shoe box black, both inside and out. This is a great backdrop for any scene. If you are creating sea creatures from the deep, it is appropriate for your water to be black, especially if you make a flashlight fish out of clay, and place an LED light inside!

painting-shadow-box

Let the paint dry overnight, and then you will want to attach a plastic aquarium plant to the bottom of the box. Use clay to attach the plant to the box. (Make sure your shoe box is on its side when you decide where the ocean floor will be!)

Pour white school glue on the bottom of the scene, gluing around the plastic plant as well as the rest of the ocean floor. Pour sand on top of the glue and shake it off.

play-doh-manta-ray

If you have some small plastic ocean creatures, you can hang them with white thread to the top of the box. I used strong packing tape, but you could also use duct tape.

We added a rock and some walruses to the top of the box, along with some dolphins splashing out of the water. (See the picture at the top of this post.)

play-doh-hammerhead-shark

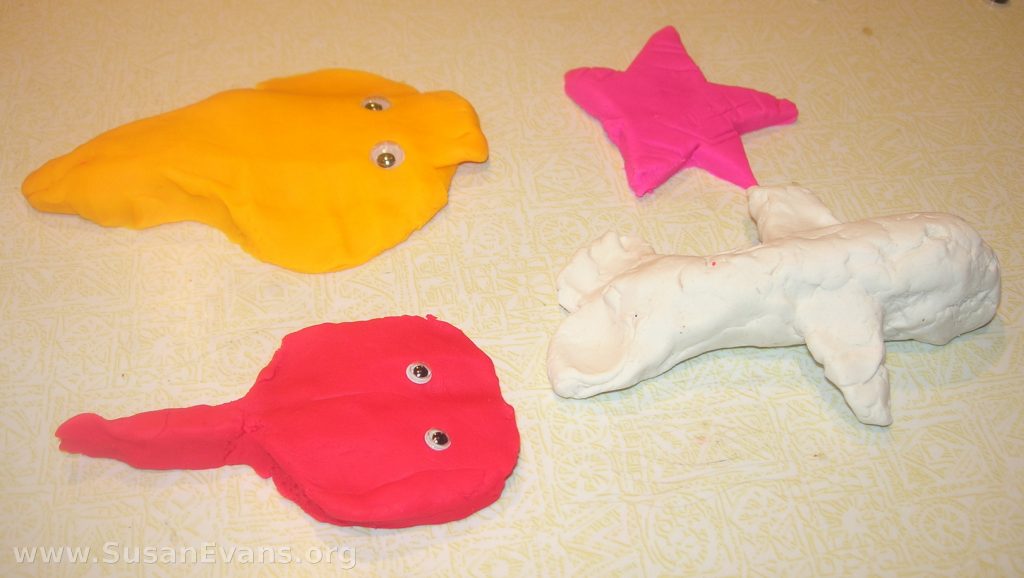
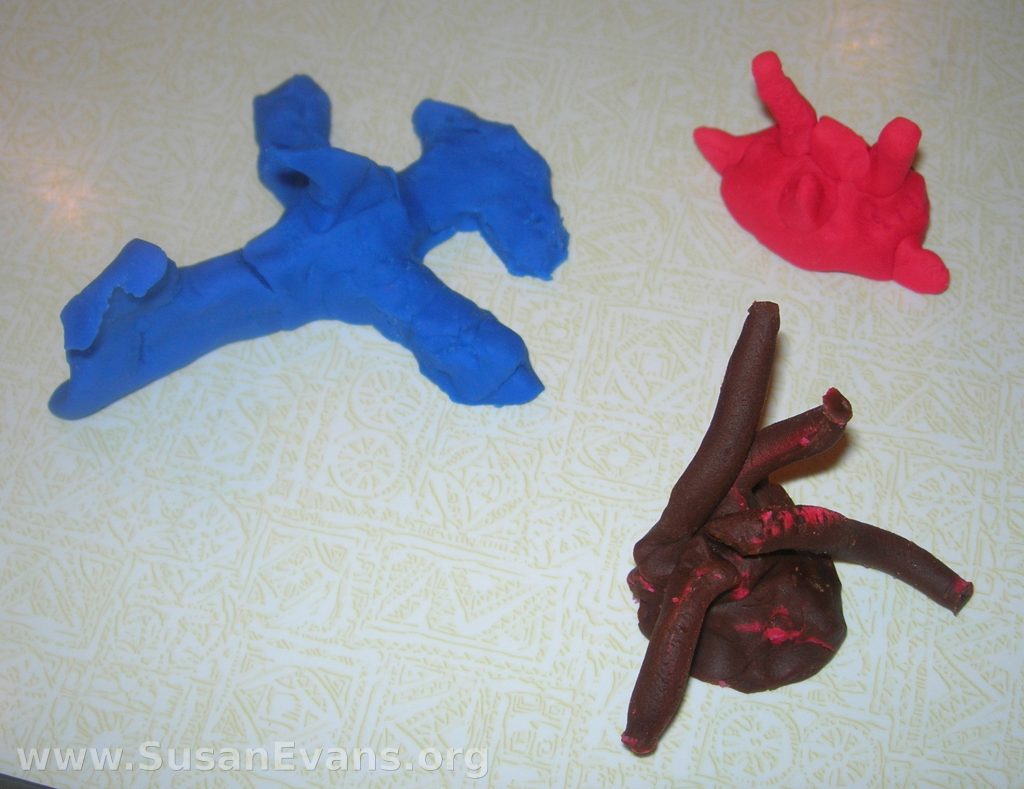
You can also create ocean creatures out of clay. We make a manta ray, a hammerhead shark, a starfish, a whale, and an anemone. If you study and shape one sea creature per day, you can add to your collection. You can display your creatures on built-in cardboard shelves that you have painted blue or black to match your shadow box, hot gluing the shelf into place.

simple-ocean-shadow-box

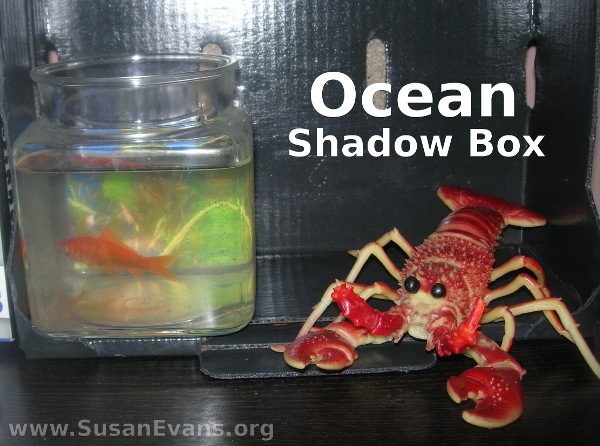
You can also make a simple ocean shadow box by spray painting a box black, adding a goldfish in a small fishbowl, and throwing seashells or any other ocean toys into the display.

Homeschool High School Room Tour

September 11th, 2017

homeschool-high-school-room-tour

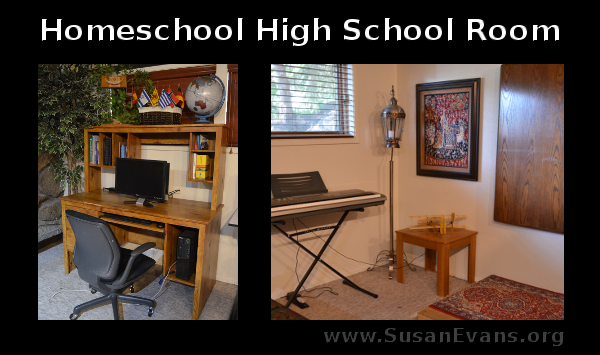
Come on a tour of our homeschool high school room!

When a homeschool family transitions their students into high school, your homeschool space will begin to change. You will need an environment that looks more elegant and suitable for teens, not baby-ish. You want your teens to not be embarrassed to bring their friends over.

Homeschool High School Room Video Tour

We filmed a tour of our updated homeschool room for teens. Take a look at the environment you might want for accomplishing the academics you need for high school:

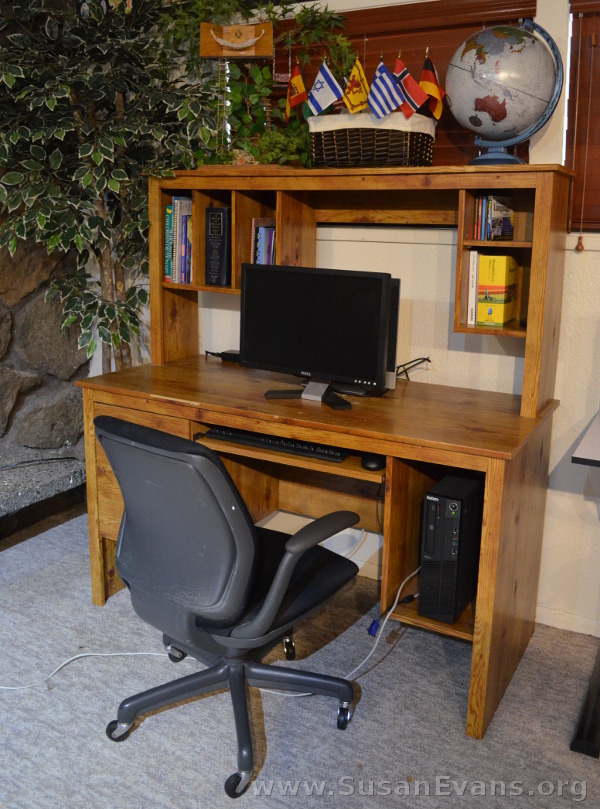
First of all, you need a computer desk with a computer. If your teens take high school math at a co-op, you might not need this area as much as you would for a computer math program for upper level math. We use Teaching Textbooks for pre-calculus and other higher-level math.

We also use computers for Spanish (Rosetta Stone), typing essays, studying Khan Academy for SAT preparation, etc. Your teens obviously need access to a computer in order to be computer literate. Also, if your teens have not learned basic keyboarding skills, you will want to make sure they know how to type fairly quickly before they go to college.

On the top of the computer desk, you can have a globe, a model of something, or flags stabbed into some sand. Hands-on models for high school science can also be stored on top of the computer desk.

high-school-homeschool

To increase the elegance of the space, you will want to get rid of all the toys that your teens have outgrown. Bold primary colors are for younger kids, so earthy tones look better for teens and adults. You can improve your living space by adding good lighting and plants. If you don’t have sunshine, high quality silk plants can make your homeschool high school room look like a resort.

You will want a desk or other flat space that is empty, so that your student has a place to work on vocabulary cards, tests, or any other written work. If you don’t have a separate homeschool room, you can always use your dining room table. One drawback of using the dining room is that if your teen is taking a timed SAT practice test or other timed test, they will be in a main thoroughfare instead of in an area where they can be alone without distraction.

high-school-white-erase-board

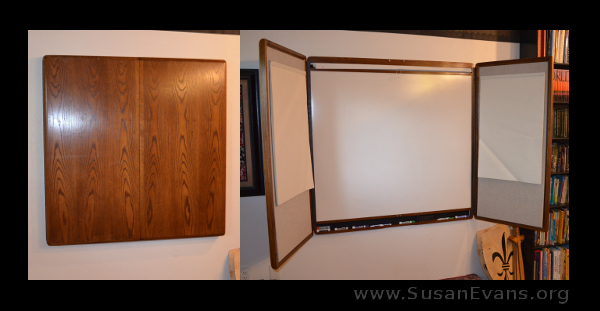
You will also want a white erase board, especially for your high school lab sciences. It doesn’t need to be as fancy as this one, which we picked up at a yard sale. You can probably find one at an office supply store, but a simple white erase board is equally effective.

We used this white erase board especially for chemistry as we wrote out huge equations. We also used it for grammar lessons. A white erase board is versatile and can be used to illustrate any point, even in history or Bible class.

My husband made a small wooden platform for speech class or small skits. We placed a rug on top of the platform, as you can see in the video.

I hope you enjoyed the tour of our homeschool high school room. This should give you some ideas for transitioning your students as they grow into teens!

For hundreds of hands-on high school activities, join the Unit Study Treasure Vault!

Come see more tours of homeschool rooms: Back to Homeschool School Room Week

Dry Ice Volcano Cake

September 4th, 2017

dry-ice-volcano-cake

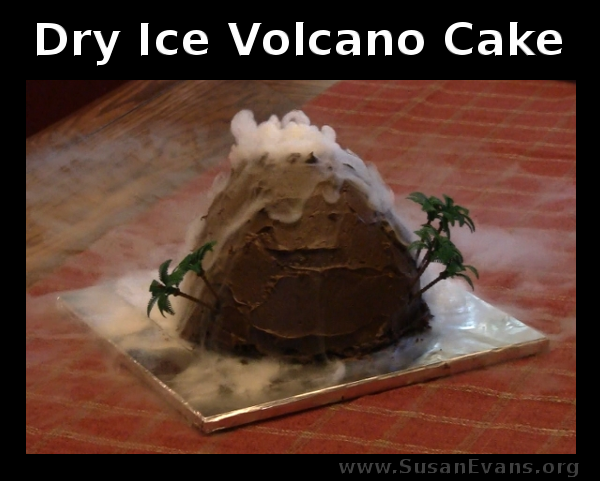
Look at this super cool dry ice volcano cake we had for my son’s natural disasters themed birthday party! I was brainstorming different ways to make a volcano cake, and I’ve never seen this done before, so I thought it would be fun to make. I wasn’t disappointed, and it was fairly easy to make!

Start by baking two cake boxes, for a total of four round cakes. Cool the cakes and place them in the fridge.

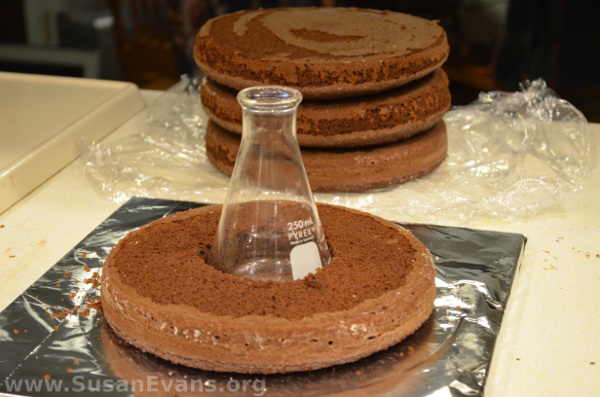
Put foil on a square piece of wood or cardboard, and tape the back. Up-end one round cake onto the center of the foil. Grab a chemistry flask and cut a circle with a knife around the edge of the flask. Remove the small circle of cake, and place the flask inside.

inside-volcano-cake

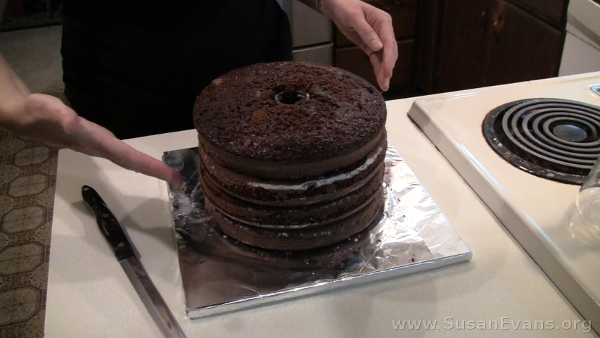
Cut circles into the other cakes, and slide them like stacking rings on top of the flask until the entire flask is hidden. If you have a taller flask, you will have to bake more cakes. This will result in a taller volcano.

chocolate-volcano

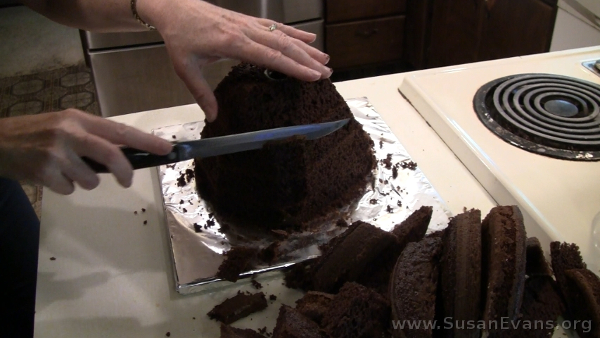
Place the entire stack in the fridge to cool. Then you are ready to sculpt the volcano. Look at the video demonstration to see how I shaped it:

You can do whatever you want with the scraps of chocolate cake that you cut off the volcano. At this point, you want to place the cake back into the fridge before frosting it.

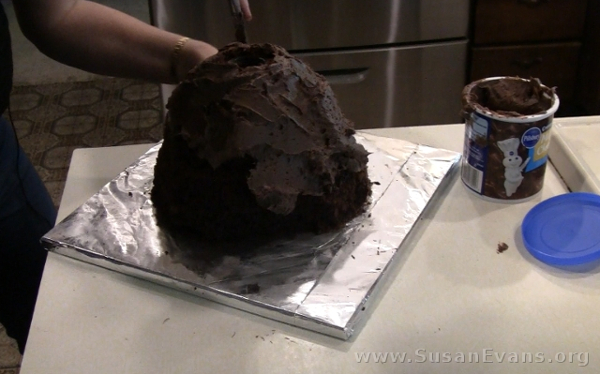
carving-volcano-cake

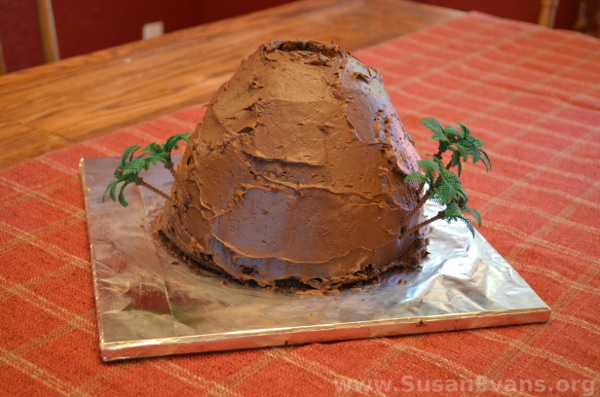
Frost the cake with chocolate frosting, spinning the cake to get the icing to be smooth. You can cover up any mistakes you made with the icing.

frosting-volcano-cake

Feel free to poke in plastic palm trees at the bottom of your volcano to add authenticity. This was my husband’s idea, since they were left over from a Hawaiian themed party we did for my daughter years ago. You can buy plastic palm trees at a party store.

make-a-volcano-cake

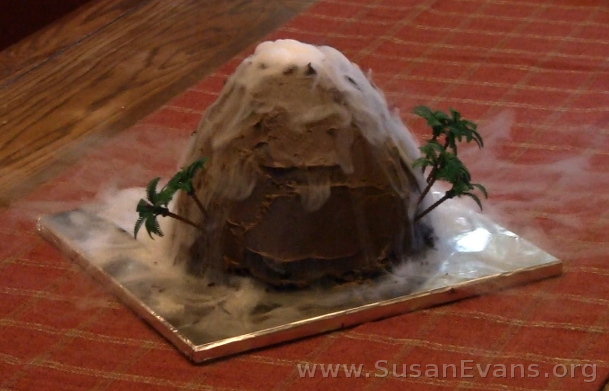
Pour hot water into the volcano. Plop dry ice chunks into the volcano. (You can buy dry ice at most grocery stores, and it’s inexpensive.) Now you will see the volcano smoking downward in an incredible way!

erupting-volcano-cake

Make sure to watch the video above to see how cool this dry ice volcano cake turned out!