Archive for the ‘Seasonal Activities’ Category

Roller Coaster Unit Study

Wednesday, July 17th, 2013

roller-coaster-unit-studyPosts may contain affiliate links.

Why not do a Roller Coaster Unit Study with your kids during your summer vacation? You can learn a lot by riding roller coasters.

Haven’t you always wondered why you’re pushed against the seat when you are riding a fast roller coaster? The answer: centrifugal force. And why is your body jerked forward when the ride ends? Because an object in motion will remain in motion unless something stops it, like the iron bar across your lap.

To learn more, you can ask yourself the following questions from the book Roller Coaster Science:

  • How does the size of the hills change during the ride?
  • Do you move faster or slower when you are at the top of a hill?
  • Do you move faster or slower when you are at the bottom of a hill?
  • As you go up a hill, do you gain or lose speed?
  • As you go down a hill, do you gain or lose speed?
  • As you go up a hill, do you feel heavier, lighter, or your usual weight?
  • As you go down a hill, do you feel heavier, lighter, or your usual weight?
  • When the ride makes a turn, are you pushed into the turn or away from it?
  • When the tracks curve, do they tilt inward or outward or are they parallel to the ground?

The book gives you an explanation for why all these things happen. It’s fun to actually pay attention to how you feel as you are riding on the roller coasters, and then later learn the science behind it.

If you want to tie in Language Arts, you can do a fun writing assignment about an amusement park:

You can build your own roller coaster out of K’nex:

Here is a free printable PDF for understanding roller coaster physics, from the Virginia Instructors of Physics:

If you want to understand the physics behind roller coasters, watch this:

As you can see, besides having a splendid time with your family, you can have a great educational experience at the same time. So why not? Go ride some roller coasters with your kids!

For more fabulous unit studies, join the Unit Study Treasure Vault.

Don’t miss out on my fun posts. Subscribe to my blog, or like me on Facebook.

Statue of Liberty Unit Study

Monday, July 1st, 2013

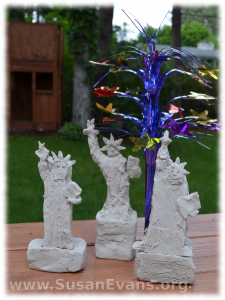
statue-of-liberty-unit-studyMy children had a fabulous time with this Statue of Liberty Unit Study.

We started by making a Statue of Liberty model. We bought a large hunk of white self-hardening clay. I took it out of the box and placed it on wax paper on top of a cutting board. I sliced it with a butcher knife into four pieces, one for each of my children.

At the table, I placed wax paper for easy clean-up. You will be banging your head against the wall if the self-hardening clay dries like cement straight onto your table, so be sure not to skip this step.

Each child should have a picture of the Statue of Liberty, to help the child draw the shape onto the front of the hunk of clay, using a plastic sculpting knife. You should cut away the clay that you don’t want. It comes off like butter. If the head looks flat like Frankenstein, you can always add more clay and fix it. If you want to erase a line, just rub your finger over it.

After getting the main shape, start adding details. Add the torch, the arm with a tablet, and the pedestal at the bottom of the statue. Then add the finishing details: the spikes coming out of the crown, the facial features, and the folds in the clothing. When you are finished, let the clay harden for two days. Take a look at how much fun my kids had with this activity:

We read the book How They Built the Statue of Liberty so that the children could understand how it was constructed. Step by step drawings helped the children see how the statue was assembled.

Here is a printable model of the Statue of Liberty, from Paper Toys. Be sure to print it on white card stock paper and watercolor light green paint on it before cutting it out and gluing it together.

Here is a free printable book full of activities from the National Park Service:

Here is a virtual tour of the Statue of Liberty:

Here is a short video tour of the Statue of Liberty:

Hundreds of unit studies like this are instantly available when you join the Unit Study Treasure Vault.

Eggshell Art

Wednesday, May 29th, 2013

eggshell-art

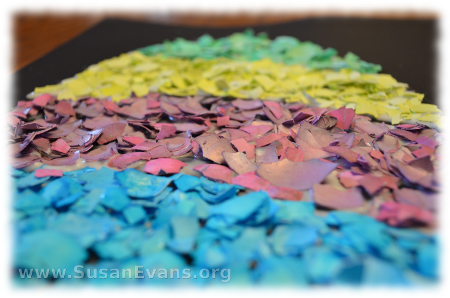
Make beautiful eggshell art with your kids. It’s easy and fun to make a mosaic with broken pieces of eggshell dyed different colors.

You will need the following materials:

  • eggshells
  • egg dye
  • paper towels
  • vinegar
  • drinking glasses
  • black card stock
  • pencil
  • white school glue

eggshell-art-3

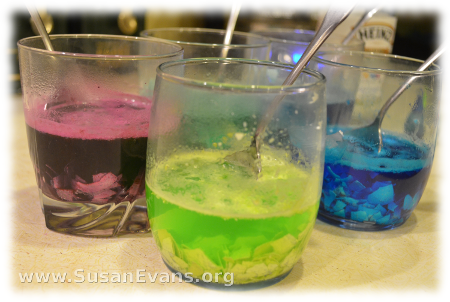
Start by dying the broken eggshells different colors. Pour half a cup of boiling water into each drinking glass, along with one tablespoon of vinegar and 10-20 drops of food coloring. Wait for 5 minutes, stirring the eggshells occasionally.

eggshell-art-5

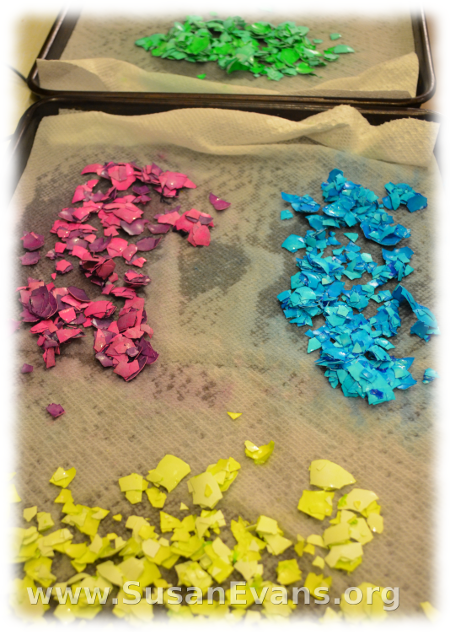
Dump each glass into a colander in the sink, one by one. Line a cookie sheet with paper towels, and place the eggshells on it to dry. Don’t mix the colors unless you’re trying to make strange confetti. Let it dry overnight.

eggshell-art-6

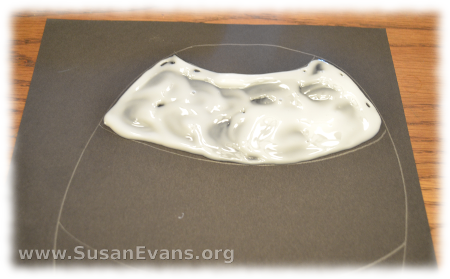
Draw a design with pencil on the black card stock paper. Then fill one area with white school glue. Dump one color of eggshells onto the page, pressing the eggshells down. Re-arrange the eggshells until they look nice. Lift the page to let the excess eggshells fall from the page. Then move on to the next color until your design is cmplete. After letting it dry, you can enjoy your finished eggshell art!

eggshell-art-2

How to Make a Spring Tree

Thursday, May 23rd, 2013

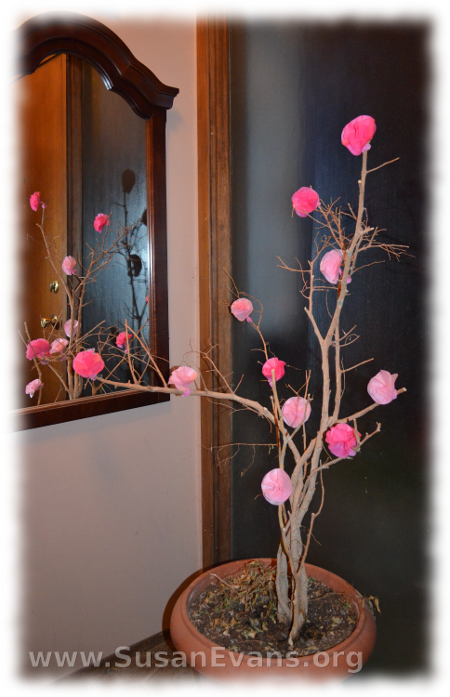
spring-treeYou can make a beautiful spring tree for your entryway by attaching tissue paper flowers to a gnarly branch stuck into some dirt in a pot.

I happen to have a dead tree in my entry way, as you well know from my Thankfulness Tree. Those who follow me on Facebook also saw a dilapidated picture of oversized ornaments hanging from it at Christmas time. Ah, yes. Why don’t I just throw the darned thing out already? Because look! I just transformed it into a gorgeous spring tree! It makes me smile each time I pass by. (And my daughter was delighted, too. My husband just rolled his eyes.)

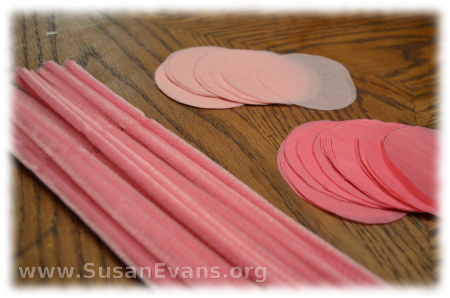
You can make tissue paper flowers with cookie cutters, and those come out more fancy than the simplified ones I’m going to show you here. Instead of using a cookie cutter, I grabbed the lid of a mayonnaise jar and traced around it on light and dark pink tissue paper. Make 4 circles with a pencil, then cut stacks of the tissue paper all at once to make this project go faster. (It’s actually easier to cut 6 or 7 layers of tissue paper than to cut one piece, because the paper is so flimsy.)

spring-tree-2

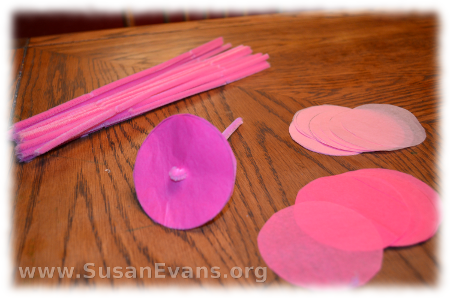
Now that all your circles are cut out, stab half a piece of pipe cleaner into the center of a stack of 4 or 5 pieces. Hook the pipe cleaner to make a lump so that the tissue paper doesn’t slide off the end. Now fluff up the tissue paper. Your flower is finished.

spring-tree-3

Make as many flowers as you like to decorate your tree. I used one large piece of tissue paper for light pink, and one for dark. I cut as many circles as I could, and I ended up with the amount of flowers you see in the picture.