Posts Tagged ‘model’

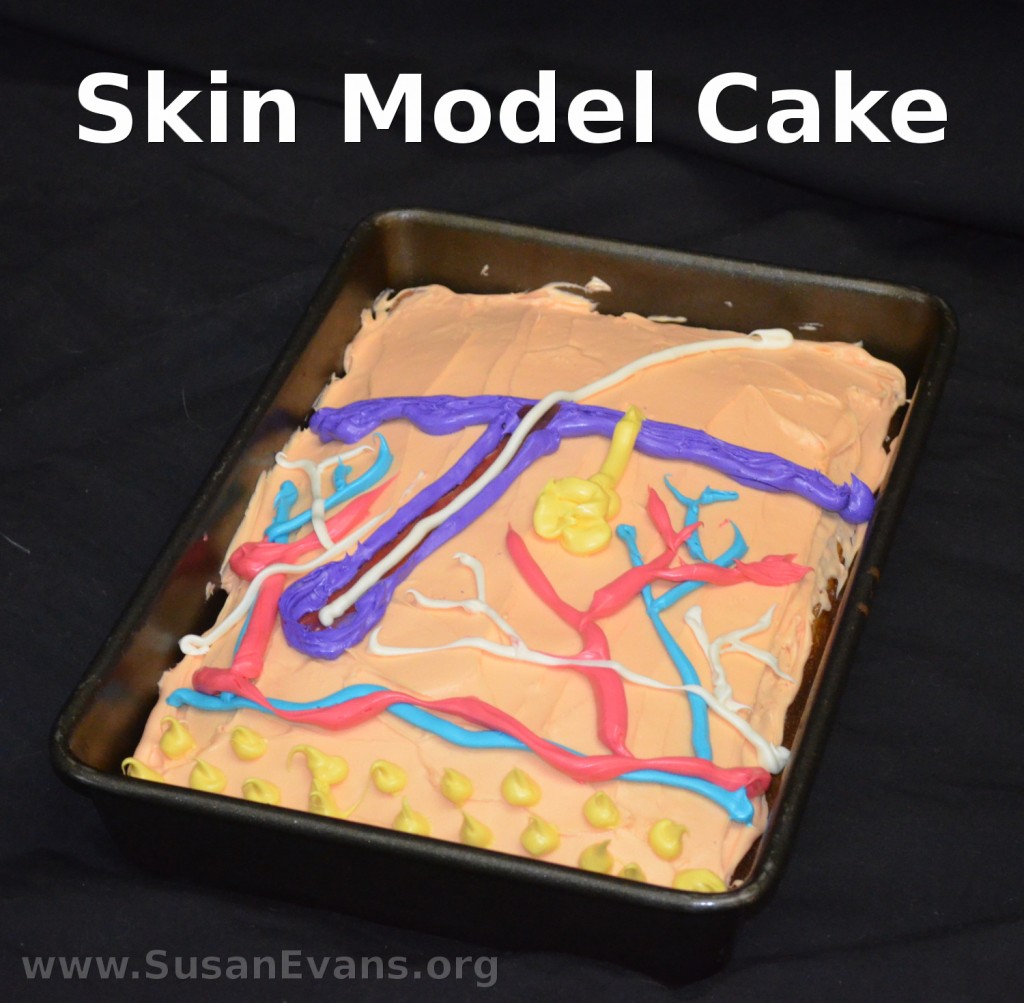
Skin Model Cake

Monday, January 18th, 2016

skin-model-cake

When studying the integumentary system in human anatomy, why not create a skin model cake? This is a great way to re-enforce the diagram of the human skin. As you form each part of the human skin with icing, you will review why each part of the human skin is important.

You will want to start by baking a rectangular cake in whatever flavor you want. Grab two tubs of white icing, and empty one of the containers into a bowl. You will want to make a skin color, so you will need a lot of yellow food coloring, and a little bit of red food coloring. Stir with a spoon until you get the right color. Then frost the entire cake with the skin-colored icing.

skin-icing

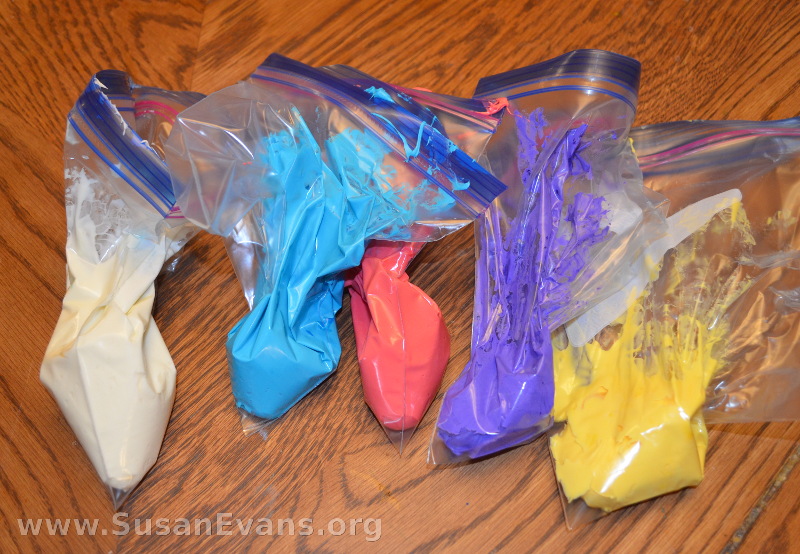
Now open the second container of icing and divide it into four bowls, but leave some white icing in the container. In the four bowls, place drops of food coloring until you have these vibrant colors: yellow, blue, red, and purple. After stirring, place the icing in small freezer bags. Cut a small hole in the bottom of each.

icing-skin-model

Now look at a diagram of the human skin, and begin “drawing” the diagram with the different colors of icing:

  • The epidermis is the outside layer of skin. Outline it purple, and continue down to the hair follicle, which is like an onion bulb.
  • Use white icing to draw a hair up and out of the hair follicle, above the epidermis. You could also use a piece of licorice for the hair, if you would like to add candy.
  • Yellow dots at the bottom of the cake represent the fat globules of the hypodermis, which is technically not part of the skin. (The dermis is the area between the epidermis in purple and the hypodermis with yellow dots.)
  • While you have the yellow icing in your hand, you might as well make the sweat gland, which is like spaghetti in a blob, going up to a sweat pore on the skin.
  • Blue icing is for veins, and red icing is for arteries. White icing is for nerves.

Now you are finished with your skin model cake. Feel free to eat it!
New Jerusalem Model

Thursday, October 31st, 2013

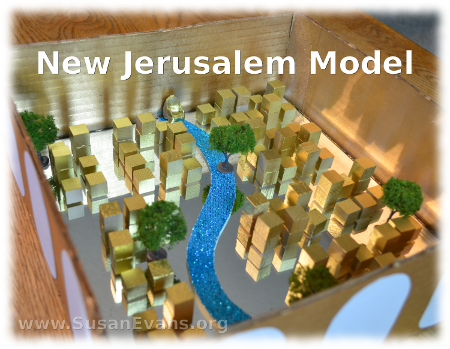
New-Jerusalem-model

When you teach your children about heaven, why not build a beautiful New Jerusalem model? Read the book of Revelation, chapters 21 and 22. (These are great chapters to read to believers who are about to die. I’ve seen these words help them to endure the passing over from death to life.)

The first item you will need is a square mirror. You can buy it at a craft supply store. This will be your base. Cut corrugated cardboard for the 4 walls, and spray paint them gold. (The walls are actually jasper, which can be a variety of colors, including a golden yellow.)

You can buy scrapbooking paper that shimmers like a pearl. Cut 12 gates out of this white pearl paper. (You can also use regular white paper.) There are 3 doors on each side of the city, and since each door is a pearl, they need to be slightly rounded at the edges.

For the throne, you can form a chair out of white self-hardening clay. Let it dry overnight. Then spray paint it gold.

For the city buildings, I used small wooden blocks from a craft store. I used wood glue to connect two blocks together for the taller buildings. I spray painted those gold.

For the river, I cut shimmering blue scrapbooking paper in a wavy line, the width of the throne. I lay that on top of the mirror. The streets of the city are pure gold–transparent–which is why I used a mirror.

I bought toy railroad trees, which I interspersed around the city, with the most important tree coming out of the river. This is the Tree of Life, whose leaves bring healing to the nations.

The video tutorial for this New Jerusalem model will be in the Unit Study Treasure Vault, where I have a gigantic Bible section. God has given me limitless creative ideas for how to teach the Word of God to children, and He prompted me to start the Unit Study Treasure Vault for homeschoolers. But anybody can join. It contains thousands of hands-on learning activities, and I add new exclusive videos every month!

Statue of Liberty Unit Study

Monday, July 1st, 2013

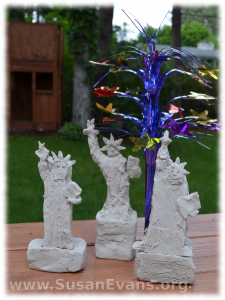
statue-of-liberty-unit-studyMy children had a fabulous time with this Statue of Liberty Unit Study.

We started by making a Statue of Liberty model. We bought a large hunk of white self-hardening clay. I took it out of the box and placed it on wax paper on top of a cutting board. I sliced it with a butcher knife into four pieces, one for each of my children.

At the table, I placed wax paper for easy clean-up. You will be banging your head against the wall if the self-hardening clay dries like cement straight onto your table, so be sure not to skip this step.

Each child should have a picture of the Statue of Liberty, to help the child draw the shape onto the front of the hunk of clay, using a plastic sculpting knife. You should cut away the clay that you don’t want. It comes off like butter. If the head looks flat like Frankenstein, you can always add more clay and fix it. If you want to erase a line, just rub your finger over it.

After getting the main shape, start adding details. Add the torch, the arm with a tablet, and the pedestal at the bottom of the statue. Then add the finishing details: the spikes coming out of the crown, the facial features, and the folds in the clothing. When you are finished, let the clay harden for two days. Take a look at how much fun my kids had with this activity:

We read the book How They Built the Statue of Liberty so that the children could understand how it was constructed. Step by step drawings helped the children see how the statue was assembled.

Here is a printable model of the Statue of Liberty, from Paper Toys. Be sure to print it on white card stock paper and watercolor light green paint on it before cutting it out and gluing it together.

Here is a free printable book full of activities from the National Park Service:

Here is a virtual tour of the Statue of Liberty:

Here is a short video tour of the Statue of Liberty:

Hundreds of unit studies like this are instantly available when you join the Unit Study Treasure Vault.

Tabernacle Model

Monday, October 1st, 2012

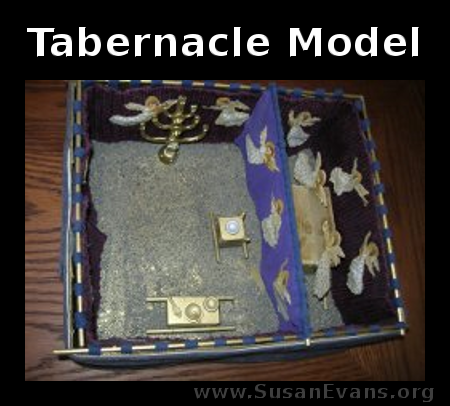
tabernacle-model

In this video, I show you how to make a Tabernacle model. You will need the following supplies:

  • a shoebox
  • pieces of cloth
  • wooden dowels
  • self-hardening modeling clay
  • a small wooden box
  • hot glue
  • gold spray paint
  • sand
  • white school glue
  • pictures or drawings of angels
  • small gold rings to slide dowels into
  • small wooden bowls (can be made from clay)

I give you directions on how to put it together in the video. I also explain why the Tabernacle is significant, and the modern equivalent of the Tabernacle today.

If you enjoyed making this Tabernacle model, you will love Using Simple Costumes and Props to Teach the Bible!