When studying the integumentary system, why not make a skin diagram collage? This art activity will help your students to remember the different parts of the human skin.
You will need the following materials:
- a rectangle of black felt (or any other background color)
- pink felt, yellow felt, and brown felt
- red, blue, yellow, and white yarn
- black pipe cleaner
- white school glue
- hot glue gun
How to Assemble a Skin Diagram Collage
- Set the black felt rectangle on the table in front of you. This is the background of your skin diagram.
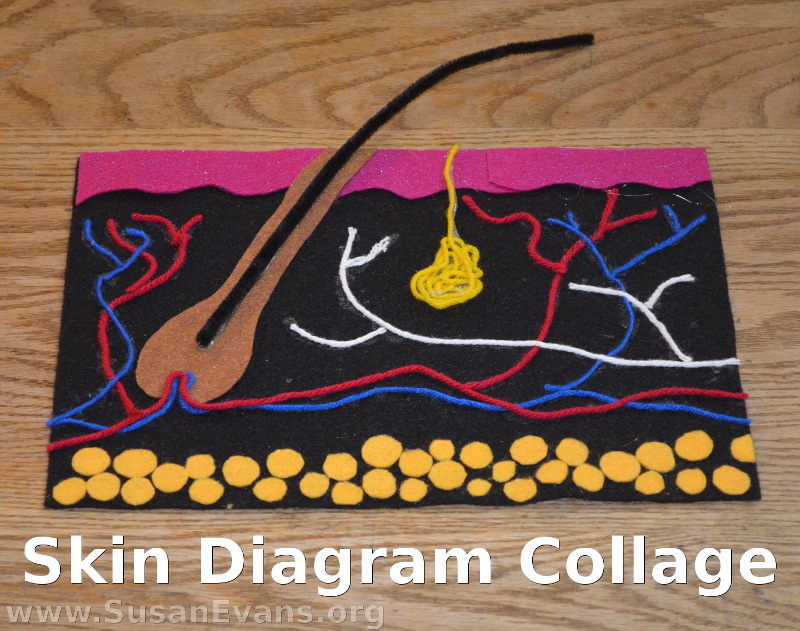
- Cut an onion bulb out of the brown felt. See diagram for shape. This is the hair follicle.
- Cut small circles from the yellow felt. This represents the fatty lipids in the hypodermis, which is not actually a part of the skin. The hypodermis lies under the dermis.
- Cut out the epidermis (the top layer of skin) from the pink felt, to make it look like icing on a cake. Glue it down.
- Glue down all your other felt figures with white school glue.
- Make a sweat gland by wadding up some yellow yarn into a blob of spaghetti. Glue it down, with the yarn going up to the epidermis.
- The red and blue yarn are veins and arteries. If you make a shape with glue, then you can shove the yarn into the glue. Distribute the veins and arteries evenly, along with the white yarn nerves. They should look like plant roots.
- Hot glue a black pipe cleaner to the brown hair follicle. This represents the human hair, which grows from the bottom of the follicle.
Now your skin diagram collage is complete. Enjoy your masterpiece.
