Posts Tagged ‘Organization’

How to Organize a Window Seat

Wednesday, January 8th, 2014

how-to-organize-a-window-seat

If you are wondering how to organize a window seat, here is a tutorial for how to section off the area with baskets and bins. The large area inside a window seat is perfect for stacking folded blankets or games in boxes. But what if you want to store other items in the window seat, including smaller objects?

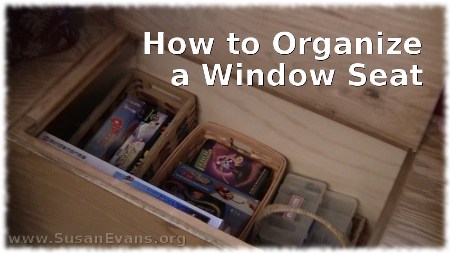
Square baskets are ideal for maximizing the space inside a window seat, and the baskets look fabulous. You can place similar items in each basket. For example, in the video I show you the electronics kit and extra wires and other electronics equipment placed all in one basket. You can further contain the items by placing wires in a plastic bag inside the basket, so that the wires aren’t sprinkled everywhere.

If you have so many games that you have trouble shutting your cupboards, you can keep the game boards, stacking them. Then place all the pieces for each game in plastic bags, and label each game with a black permanent marker. Click here to find out other ways to organize games in cupboards and drawers.

Don’t forget that you can also stack baskets and bins on top of each other, to store even more items in your window seat.

Make sure that if you are installing a new window seat in your home, you use the space under it for storage. Have the carpenter place a hinge on the top so that you can open and close the top. Or you could open the window seat from the front, like a cupboard. The important thing to remember when organizing the items in your house is to not waste space.

Here is the video tutorial on how to organize a window seat:

If you want to know more about how to organize your home, check out Organizing for a Fun Homeschool.
Fun Art Supply Ideas (Free PDF)

Monday, September 9th, 2013

fun-art-supply-ideasHere is a list of fun art supply ideas for making art projects with your children:

  1. Colored pencils
  2. Stapler
  3. School glue
  4. Scissors
  5. Construction paper
  6. Crayons
  7. Markers
  8. Glitter
  9. Tempera paint
  10. Watercolors
  11. Wooden sculpture base
  12. Clay
  13. Chalk
  14. Rubber stamps and ink
  15. Large roll of paper
  16. Yarn
  17. Twine
  18. String
  19. Hole punch
  20. Computer paper
  21. Fake jewels
  22. Buttons
  23. Glass jars
  24. Foil
  25. Pipe cleaners
  26. Hot glue gun
  27. Fabric scraps
  28. Tape
  29. Paper fasteners
  30. Juice lids
  31. Checkbook boxes
  32. Large cardboard boxes
  33. Plaster of Paris
  34. Needle and thread
  35. Sewing Machine
  36. Felt
  37. Gold rope
  38. Velcro
  39. Easel
  40. Card stock paper
  41. Newspaper
  42. Clear contact paper
  43. Fabric glue
  44. Cookie cutters
  45. Stencils
  46. Nature journal
  47. Acrylic paint
  48. Paintbrushes
  49. Tracing paper
  50. Popsicle sticks
  51. Paper bags
  52. Safety pins
  53. Leather scraps
  54. Wood scraps
  55. Drawing pencils
  56. Art eraser
  57. Small seashells
  58. Sand
  59. Scrapbook paper
  60. Small pom poms
  61. Ribbon
  62. Colorful tissue paper
  63. Toothpicks
  64. Hammer and nails
  65. Shoe boxes
  66. Magnetic tape
  67. Small fake ivy
  68. Feathers
  69. Rubber bands
  70. Fabric markers
  71. Florist wire
  72. Oil pastels
  73. Skickers
  74. Mosaic tiles
  75. Art books

Here is a free PDF download of this list:

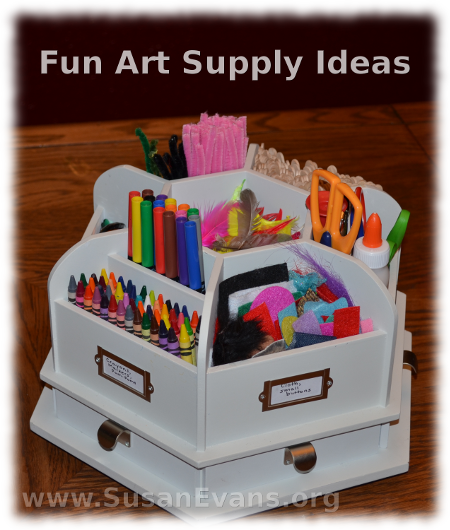
How do you organize these fun art supplies? I show you one way to organize your art supplies in this 2-minute video. You will see a lot of the art supplies listed above inside this organized contraption:

Why not get a fresh homeschool room makeover? Check it out here.

Controlling Paper Clutter

Thursday, January 24th, 2013

controlling-paper-clutterIs paper clutter taking over your entire house? Are there piles of bills every week that you have no time to keep up with? Controlling paper clutter is one habit that you can begin so that you have more control over your life. You will feel caught up and fresh and light. It’s worth doing.

Here are my secrets to how I stay on top of paper clutter:

  • Get a filing cabinet or a copy paper box if you have no money for a file. (You can cover the copy paper box with lovely fabric to match your decor if you’re into that sort of thing.) Put dividers into your filing cabinet, with a label for each kind of bill.
  • Sort all your stacks of papers into piles on the floor in front of you. All the telephone bills go in one pile, all the Visa bills in another, dentist stuff in another.
  • Catch up on all your filing.
  • Now every time a new paper comes through the door, deal with it right away. Throw it in the trash, pay the bill, or file the paper. Since there are only a few, if you get into the habit of doing it immediately, you will always stay on top of it.
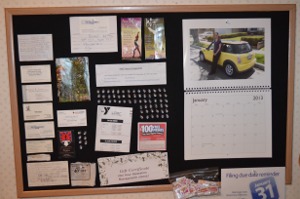
  • If you have no money to pay a bill, clip it to your bulletin board and pay it as soon as you can. If you have a paper that is the schedule for your children’s basketball games, clip that to the bulletin board or post it on your fridge. It helps to transfer the dates onto your calendar so you don’t miss the practices and games.
  • If you have no time to sort mail when you bring it inside, put the mail in one pile and deal with it as soon as you can, like right after dinner. If there is a designated time to deal with it, it will get done. I just remember back when I was a teacher, I would come home and need to lie down for a few minutes before I could do anything else. So just deal with the pile as soon as you get some rest and food in your stomach. You could even set out a basket for incoming mail on your counter so that the stack doesn’t look so hideous until you can deal with it.

Covering a Bulletin Board with Cloth

Monday, January 14th, 2013

covering-a-bulletin-board-with-clothSince I love decorating as well as organizing, one way to make a bulletin board look lovely is covering a bulletin board with cloth that matches your decor. For example, if you have deep red in the room, find a fabric that contains those colors for the backdrop of your bulletin board. A good color that will match any room is black, since it provides contrast to help you see what is pinned up.

In the video, my husband shows you the steps to make a beautiful cloth-covered bulletin board. First you should gather your supplies: a bulletin board, cloth that is slightly larger than the bulletin board, a metal spatula (used for painting), spray adhesive, fabric scissors, and a silver Sharpie marker. The bulletin board should have a frame on it.

  1. Set the cloth down on the table, wrong side up. Place the bulletin board on top of it. With the silver marker, draw a line around the bulletin board.
  2. Grab the scissors and cut half an inch inside the rectangle. (Watch the video to see what I mean. It’s not hard.)
  3. Shove one end of the cloth under the frame at the top of the bulletin board with the metal spatula. When it is all even, use the spray adhesive. Spray evenly all over the bulletin board, and lay the cloth down over it, making sure the cloth is long enough to fit under the frame on the bottom. If not, pull it slightly down, making sure it’s still tucked in at the top.
  4. Shove the bottom of the cloth into the frame. Continue with the sides until you have a finished frame. Now hang the bulletin board on the wall.

Covering a bulletin board with fabric makes your bulletin board looked dressed up and will make you feel more organized as you stay on top of your to-do’s.

At this point, take all the junk off your old bulletin board, and then only put up the things that are relevant on the new bulletin board, throwing the rest away. This might mean that you need to do a few chores, like pay a bill or make a phone call, but you will visually feel more caught-up if your bulletin board is in order and looking lovely.

Linked to Tackle It Tuesday