Archive for the ‘Geography’ Category

Orange Globe

Wednesday, December 11th, 2013

orange-globe

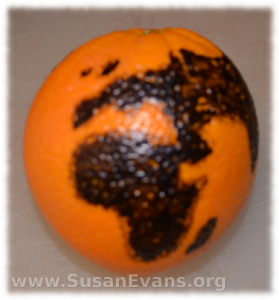
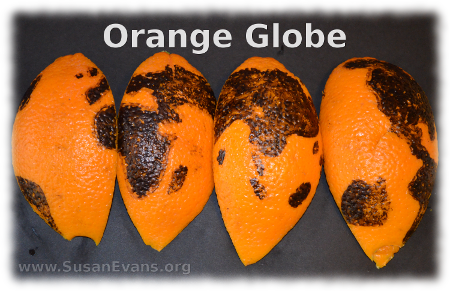
orange-globe-2When I was a little girl, I saw this orange globe activity in many books. Recently my daughter read about it in a McGuffey reader, and I decided to make this fun orange globe to understand why flat maps are distorted on the top and the bottom of the maps.

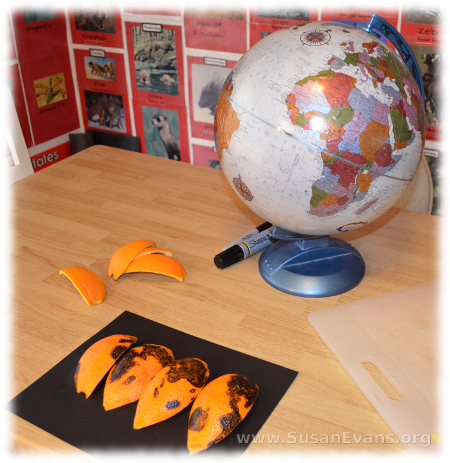
First you will need an orange, a black Sharpie marker, and a knife. Draw a globe on the orange, using a real globe or a picture of a globe to draw the outlines of the continents. Then fill in the continents so that they are solid black.

If you have more than one orange, you can show your children the equator by slicing the orange in half right at the middle. The top part of the orange is the Northern Hemisphere, and the bottom part of the orange is the Southern Hemisphere. You can talk about lines of latitude and longitude.

But if you only have one orange, you will want to cut it into quarters from top to bottom. Scoop the juicy orange out of the peel, being careful not to smudge the marker. Then flatten the pieces of orange on a piece of black card stock paper. Now you will be able to compare this to a flat map of the world. Your kids will laugh at how stretched out the flat maps are, compared to the orange segments.

orange-globe-3

Since the earth is round, a flat map must be distorted in order to show the globe. This is why globes are a more accurate representation of the continents than flat maps. However, flat maps are more useful for many practical reasons, including trying to find your flight at the airport, to find the most direct route to your destination. To see the entire earth at one time, we must make the map flat.

Here is a short video showing how to make this orange globe:

If you enjoyed making this orange globe, you will love Living Geography: Travel the World from your Living Room.
Teaching Geography with Coins

Monday, July 29th, 2013

Teaching-Geography-With-Coins

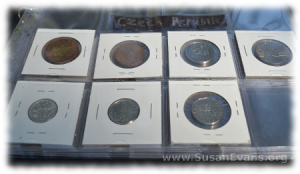
A fun way for kids to learn about the countries of the world is to look at coins from other countries and start their own coin collections. Teaching geography with coins is a great way to touch something from another country and to figure out what is important to that country.

Where can you find coins for your children?

  • From your own travels to different countries
  • From relatives or friends who have been to other countries
  • From people at your church who have returned from missions trips
  • From other homeschoolers who can swap coins with you
  • From coin collecting shops

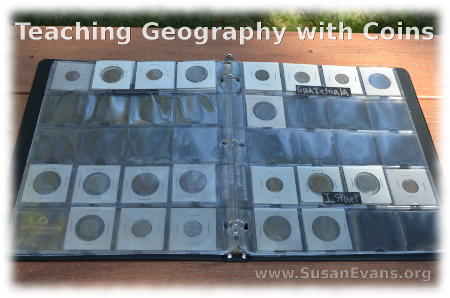
How do you start a coin collection? First you will need a 3-ring binder. Next you will want to purchase coin collecting pages, which are plastic pages with 20 square pouches on each page. You can buy these at a coin collecting shop. Look up “coin collecting” in your local yellow pages, or google “coin collecting” and your city. Most cities have a coin collecting store.

teaching-geography-with-coins-2Besides the binder and the plastic pages with pouches, you will want to get the cardboard squares that will hold the coin in place. You staple those shut with a special stapler that is smooth on both sides so that it doesn’t hurt the plastic. Label the countries with little slips of paper taped to the plastic sheets.

If you are dirt poor and don’t want to spend any money whatsoever, you can collect loose coins in a clear Ziplock bag to look at whenever you want. You can do rubbings of the coins by placing the coins under a sheet of paper, and rubbing crayon across the top. You can staple your coin rubbings together into a booklet. This is particularly good to do if you are only borrowing the coins from someone, and you need to give the coins back.

What can you learn from countries by looking at coins? These are some of the emblems we found on our coins from around the world, showing what is important to each country. These pictures might help you identify where your coins are from:

  • Canada–maple leaf, queen
  • Egypt–scorpion, map of Africa
  • France–woman in a dress, head of a woman
  • Germany–head of a man, woman planting, eagle
  • Greece–helmet of armor on a man, Parthenon
  • Guatemala–woman’s head with headband, tree, man’s head, stone monument, quetzal bird
  • Ireland–harp, bull, Celtic design
  • Israel–Dome of the Rock, top of a column, golden lampstand, fleur-de-lis, harp
  • Italy–woman’s head, Roman gods and goddesses
  • Mexico–eagle with snake in beak
  • Netherlands–crown, queen
  • Spain–men’s heads, shield, pillars, crown
  • United Kingdom–one king, all the rest queens, portcullis, crown, chains, Poseidon with trident, coat of arms, ship, lion with crown

These were just a few of the observations my children called out to me as they were examining the coins from their coin collections. Teaching geography with coins was a fun experience for my family!

For fun and easy ways to teach geography to your kids, watch Living Geography: Travel the World from your Living Room.
French Cafe for Kids

Monday, July 15th, 2013

french-cafe-for-kids

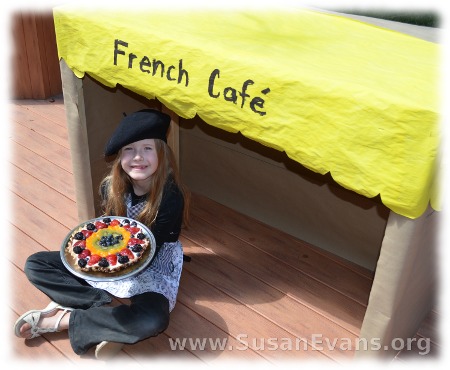
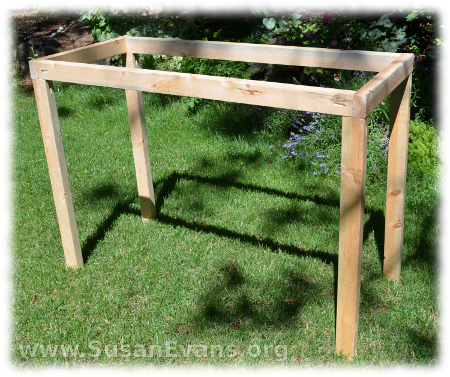
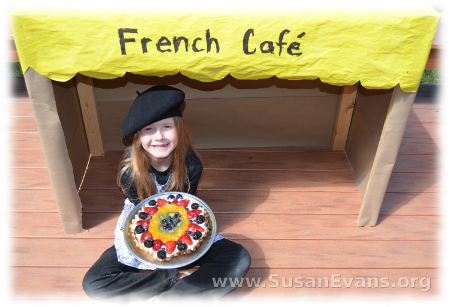
A fun activity to do with your kids when they are learning about France is to construct a simple French cafe for kids. You will need 8 two-by-fours screwed together to make a frame.

french-cafe-for-kids-2

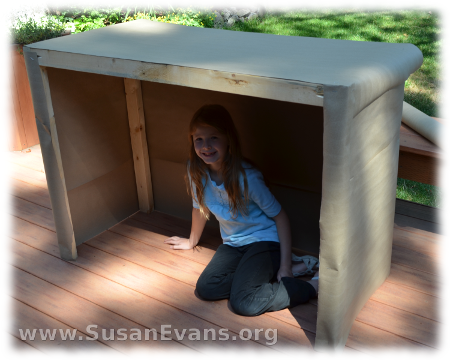
Next you want to staple a roll of brown paper around the outer edge of the frame on three sides. Also make a paper ceiling.

french-cafe-for-kids-3

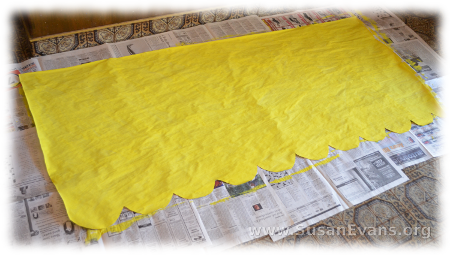
If you have a roll of colorful paper, you don’t have to paint it. We got a free roll of paper from the newspaper office, and we painted that yellow. We allowed it to dry for 3 hours. Then we cut waves into it, like the top fringe of a French cafe would look in Paris. We wrote “French Cafe” on the fringe with an extra thick black marker.

french-cafe-for-kids-4

Go ahead and staple that to the top of the wooden frame, and you have a finished cafe!

french-cafe-for-kids-5

Load up your cafe with French pasties and strong coffee. Set out small tables and chairs outside your cafe, and serve your friends while listening to French music playing in the background. Bon Apetit!

More great ideas for teaching geography: Living Geography: Travel the World from your Living Room

Don’t miss any of my fun posts! Subscribe to my blog and like me on Facebook.

Japanese Activities for Children

Tuesday, May 15th, 2012

Japanese-activities-for-childrenIn this fun hands-on video, I show some Japanese activities for children. The activities include the following:

  • wearing kimonos
  • eating Japanese food
  • playing with Japanese toys
  • brush painting calligraphy
  • tasting green tea at a tea ceremony
  • folding origami, including a windmill and a frog
  • playing with an abacus
  • fishing with a net
  • flying Japanese kites

Japanese-activities-for-children-2My family attended a Japanese Day at a local community college, and the college students (exchange students from Japan) had booths with the different Japanese activities for children. Each table was set up and ready for the children to mill around and enjoy the different displays. We listened to some Japanese music, too. After spending about an hour on these engaging Japanese activities, our family went out to eat at a Japanese restaurant. My children were able to sample more Japanese foods.

This would be a fun co-op activity to do with other homeschooling families. You could choose a different country once a month and set up hands-on activities at each table in a church gym, so that the children can experience different aspects of each culture. What a great way to learn geography!

More fun ideas for teaching geography to children: Living Geography: Travel the World from Your Living Room