Archive for the ‘Science’ Category

Growing a Bean Seed

Wednesday, November 6th, 2013

growing-a-bean-seed

Kids of all ages can learn a lot by growing a bean seed, from toddlers to high school biology students. It’s fun to watch life sprout from a seed.

If you want to grow a bean seed, you will obviously need dry bean seeds, which you can buy at a grocery store. You will also need a wet paper towel and a Ziplock bag.

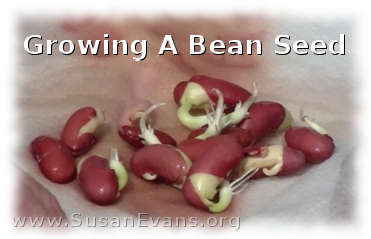
Place a few bean seeds into a wet paper towel, and place them in a Ziplock bag. It’s that easy. Wait a week, then open it up and have your kids observe what happened. The beans will have sprouted, and if you leave the beans in the bag for another week, they will desperately search for sunshine by peeking around the paper towel.

In this video, I will show you the different parts of a bean seed, as described in botany and biology textbooks. The bean seed is a dicot, meaning that it has two cotyledons or embyonic leaves. The cotyledons are used for food for the developing embyo:

Have fun growing a bean seed! Then grow other seeds and compare them!
Growing a Sweet Potato in Water

Monday, May 27th, 2013

growing-a-sweet-potato-in-water

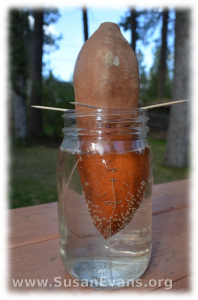
Growing a sweet potato in water is a great way to see plant roots growing. You will need a sweet potato, a jar, water, and four toothpicks.

You will want to dip the sweet potato into the water about a third of the way down. Stab the toothpicks into the potato to keep it in place. Fill the jar with water. Now watch the roots grow right in front of your very eyes.

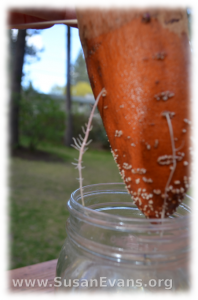
First you will see stubble, like a man who hasn’t shaved in a couple of days. This happens within the first few days. Then a few of the roots grow longer, branching out with root hairs. Since the jar is clear, you can see all this happening.

Other people buy expensive kits that have glass walls on either side so that you can see the roots of carrots and radishes growing, but the dirt is still in the way. With growing a sweet potato in water, you can see the root developing without any dirt in the way, and it doesn’t cost a lot.

growing-a-sweet-potato-in-water-2In biology this year, we studied the sections of a root, looking at the root under a microscope. The children were fascinated when they looked at prepared slides of monocot and dicot roots, which apparently have a different structure. Monocot roots have a circle shape in the middle, whereas dicots have an X shape.

The main way to know if a plant is monocot or dicot is to look at its leaves. If the leaves are straight up and down like leaves of grass, it’s a monocot. If the leaf has veins branching out, it’s a dicot.

You can see all the other activities we did in biology this year in the Unit Study Treasure Vault.

Linked to Laugh and Learn

Vinegar And Baking Soda Experiment

Friday, May 17th, 2013

Erupting volcanoes aren’t the only reason you will want to do a vineger and baking soda experiment with your kids. If you want to see a cool, frothing explosion any time, you can add some blue food coloring to your baking soda in a small container. Stir it well. Now add the vinegar by pouring to into the baking soda, and you will see the blue froth coming out of the container in a fun way. Be sure to put a larger container underneath to catch the excess explosion so that it doesn’t stain your counter.

vinegar-and-baking-soda-experimentThis science experiment takes less than five minutes and is sure to impress any kid, especially young ones who have never seen it before. My own kids have erupted lots of volcanoes this way, adding red food coloring to a film canister inserted into a mud volcano outside. Create four different kinds of volcanoes side by side: cinder cones, composite cones, shield cones, and lava domes. Then have four kids get ready to pour vinegar into their volcano tops. Shout, “Ready, set, go!” See which volcano erupts first.

You can use my Amazon affiliate link to buy a volcano model, which has a hole in the top for doing your vinegar and baking soda experiment. The model shows the inside of a volcano and is good for studying the anatomy of the volcano.

How to Make a Pop Bottle Bird Feeder

Friday, April 12th, 2013

how-to-make-a-pop-bottle-bird-feeder

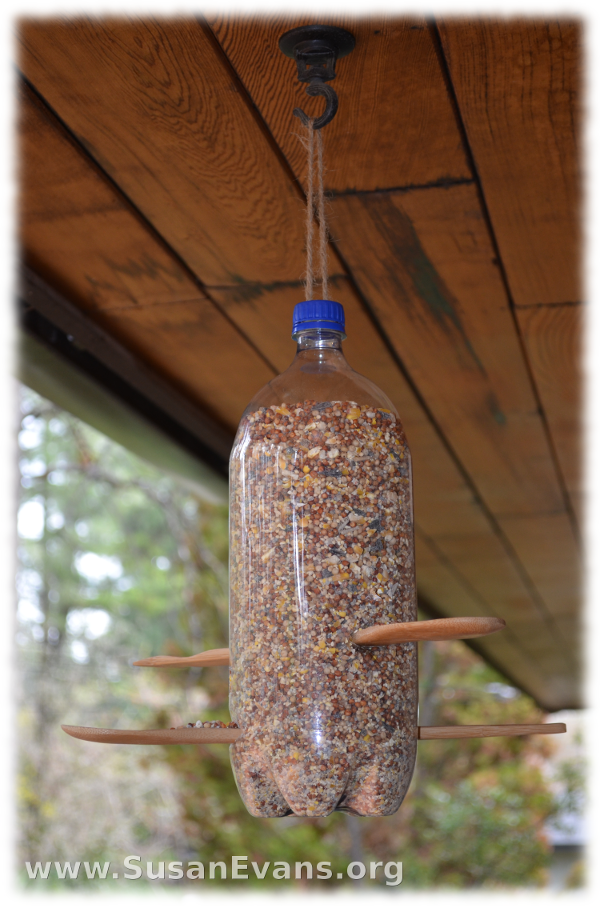
This is how to make a pop bottle bird feeder. We made one last night to attract more birds to our yard. For some reason we haven’t seen as many birds ever since we got a cat. But this handy-dandy bird feeder will bring back all those birds that came last time we made this popular feeder, when our boys were in Cub Scouts. These are the supplies you will need:

  • empty pop bottle with lid
  • bird seed mix
  • two wooden spoons (from dollar store)
  • sharp knife or razor blade
  • twine
  • large hook
  • funnel
  • drill (optional)

how-to-make-a-pop-bottle-bird-feeder-2Cut a slit for the wooden spoon, barely big enough to slide the spoon through. Cut a slit on the other side of the bottle, so that the spoon can come out the other side. Do the same with the second spoon, placing it at a right angle so that two birds can eat at the same time.

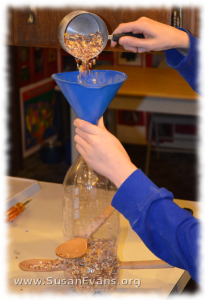
Fill the bottle with bird seed mix. Now make a hole right above the spoon, about 1/2 inch across, so that some seed will come out onto the spoon. Do the same to the other spoon. My husband said cutting the hole works better with the seeds inside the bottle, because the bottle is more sturdy and won’t collapse when you are trying to cut it.

You can drill two holes in the lid and put some twine through it, tying a knot on the inside so it won’t be seen. Or if you don’t have a drill, just tie the twine around the top of the bottle and hang it up on a hook right outside your window.

“How come the birds aren’t coming yet?” asked my daughter the next morning. She didn’t remember the last time we had a bird feeder. The birds fought over the bird seeds like they were starving, with the squirrels eating all the spilled leftovers.

“They need to find the bird feeder. Once they find it, they’ll come,” I said, trying to reassure her.

“Or maybe it’s because the cat is sitting under it,” I thought to myself…