Posts Tagged ‘art’

The Altar of Elijah

Tuesday, October 15th, 2013

the-altar-of-Elijah

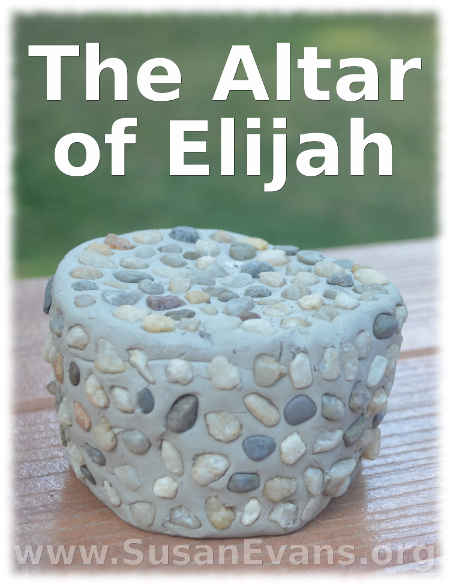
To make a craft of the altar of Elijah, all you will need is some white self-hardening clay and small pebbles. Roll the clay into the shape of an altar, like a short cylinder. Press the pebbles into the clay. You’re done! How easy was that? And great fun for all ages!

Now you are ready to tell the story of the altar of Elijah, found in I Kings 18:20-39. The priests of Baal try to get their god to accept their offering by having fire come down from heaven. It never happens, even when they cut themselves to indicate that they are dedicated to their god. Elijah insults them by telling them to yell louder, that maybe their god is taking a nap.

the-altar-of-Elijah-2Finally at the end of the day, it’s Elijah’s turn. He tells the people to pour four pitchers of water on top of the altar three times, as well as digging a trench around the altar. The entire trench is full of water. He prays once, and fire thunders down from heaven, consuming the entire sacrifice and licking up all the water. The people fall down on their faces and say, “The Lord, He is God!”

Sign up below for a free printable e-book of this Bible crafts series!

If you enjoyed making the altar of Elijah, you will love Using Simple Costumes and Props to Teach the Bible. You receive this 2-hour video for free when you sign up for the Unit Study Treasure Vault, which has an enormous Bible section that you will love!

Ten Commandments Clay Craft

Thursday, October 10th, 2013

Ten-Commandments-Clay-Craft

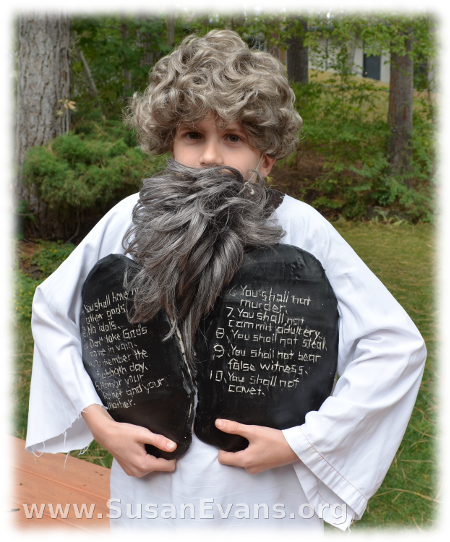
When you are studying the Ten Commandments with your children, a fun art activity to make is a Ten Commandments clay craft. You will need the following items for this activity:

  • 10 pound box of white self-hardening clay
  • butcher knife (for cutting the clay in half)
  • cutting board
  • rolling pin
  • table knife
  • black acrylic paint
  • toothpicks
  • wax paper

ten-commandments-clay-craft-2

First you will cut the block of white self-hardening clay into two pieces with a butcher knife. I like to put wax paper on top of the cutting board for easy clean-up. Unroll another two pieces of wax paper on the table. Place one hunk of clay in the center of each piece of wax paper. Roll it out with a rolling pin.

Yes, it is hard at first, but it gets easier. You (an adult) can get the rolling started by standing above it and using your weight to press down on the rolling pin. After it’s somewhat flat, it’s much easier to roll out, so kids can take over at this point. Roll the clay into large tablets that look like the Ten Commandments.

ten-commandments-clay-craft-3

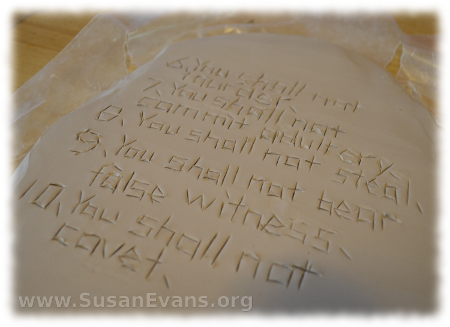
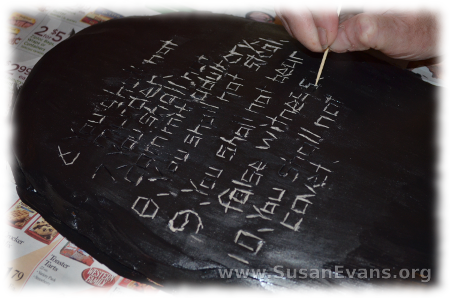
Now use a table knife to carve the Ten Commandments into the clay. Let it dry for about a week. Usually self-hardening clay dries in two days, but these Ten Commandments are so large and thick that they take longer to fully harden.

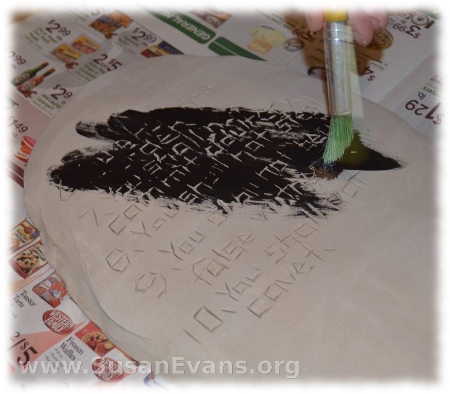
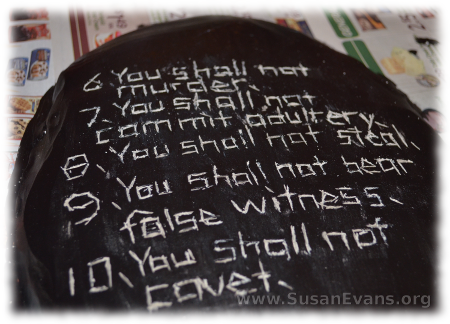
Now brush black paint on top of the tablets, trying not to get any paint in the grooves.

ten-commandments-clay-craft-4

It’s no big deal if you get paint in the grooves of the words, because you can just use a toothpick to carve out the words again. This is easy to do, since you just follow the indentations that are already there. Now your Ten Commandments clay craft is complete.

ten-commandments-clay-craft-5

Sign up below for a free printable e-book of this Bible crafts series!

If you enjoyed this Ten Commandments clay craft, you will love Using Simple Costumes and Props to Teach the Bible. You receive this 2-hour video for free when you sign up for the Unit Study Treasure Vault, which has an enormous Bible section!

Joseph’s Coat of Many Colors

Tuesday, October 8th, 2013

Joseph's-coat-of-many-colors

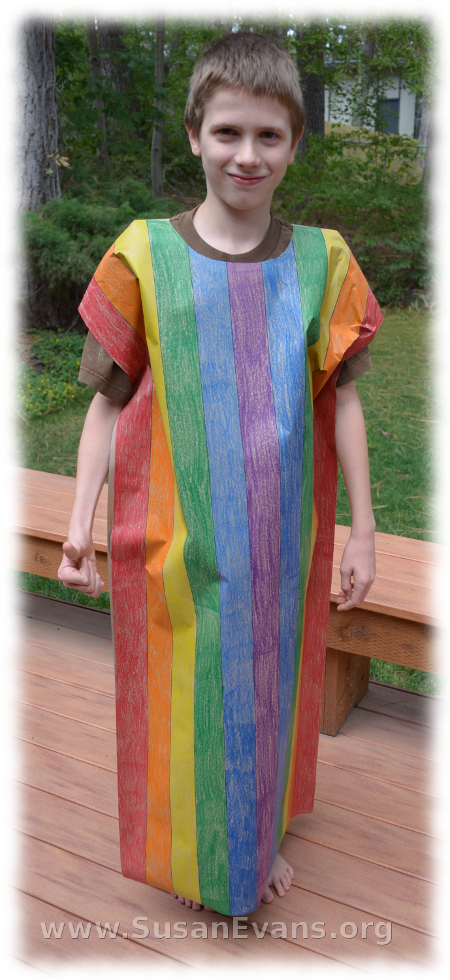
Joseph’s coat of many colors can be made easily with a large roll of paper and some crayons. You will also need scissors, a black marker, a ruler, and a stapler. I used a roll of brown packing paper, which you can find at office supply stores for around $5, but you can also use teacher’s bulletin board paper found at teacher supply stores. End rolls from newspapers are too thin for this project, tearing too easily.
Joseph-3

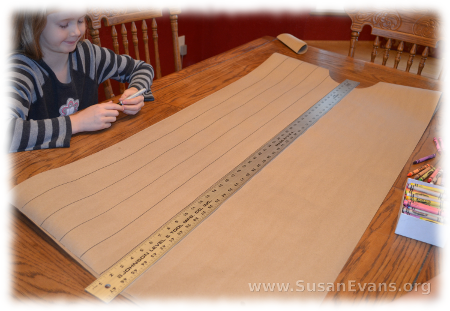
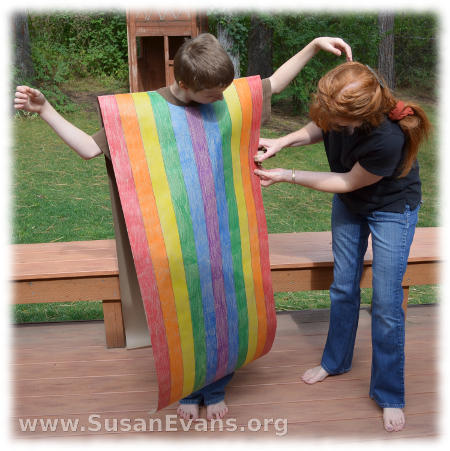
Check the height of the child who will be wearing this coat of many colors. Hold the paper up to his body, and cut it to whatever length you want. Fold the strip of paper in half before cutting. Then cut a hole at the top for the head.
Joseph-6

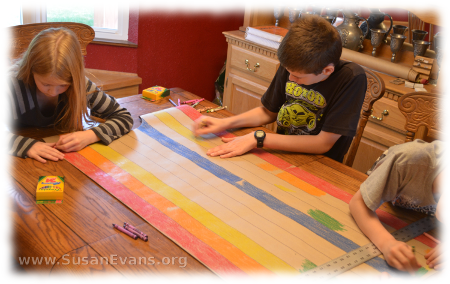
Grab a black marker and a long ruler, and draw stripes down the tunic. Have the kids color the stripes in different colors of the rainbow.

Have the child put Joseph’s coat of many colors over his head. He should hold his hands to his sides while you staple down the sides. Now smash the top of the tunic, putting the child’s arms down, wrinkling the top so that Joseph doesn’t have to look like a scarecrow. Joseph’s coat of many colors is now complete.
Joseph-7

Every time I read the story of Joseph in the last 13 chapters of Genesis, I get choked up because Joseph forgave his brothers for the horrendous suffering he had to endure for years because of their actions. His brothers had wanted to murder him. Just let that sink in. Imagine living in a house where people wanted to murder you. They had so much hatred because their father gave Joseph a coat of many colors, showing his favoritism. His brothers decided to make themselves some money, so they sold him as a slave instead of murdering him. They lied to his father, allowing his father to scream in anguish at the death of his son.

Years later, after working as a slave, being falsely accused and thrown into prison, and then rotting there for years, he was finally given a position of power in the government because he was able to interpret Pharaoh’s dream. He knew that there would be a 7-year famine in the land after 7 years of abundance, so he stored up grain.

His brothers came to Egypt because of the famine, only to find the one that they had injured now had the power of life and death over them! (The dream that Joseph had about his brothers bowing down to him came true!) But he chose to forgive them instead, telling them what they intended for evil, God intended for good. I just love this story of forgiveness!

Sign up below for a free printable e-book of this Bible crafts series!

If you enjoyed this Bible lesson on Joseph’s coat of many colors, you will love Using Simple Costumes and Props to Teach the Bible. You receive this 2-hour video for free when you sign up for the Unit Study Treasure Vault, which has an enormous Bible section that you will love!

Cardboard Model of Noah’s Ark

Thursday, October 3rd, 2013

model-of-Noah's-ark

Create a three-dimensional model of Noah’s ark by making a cutaway of the bottom deck of the ark. In this video, I will show you how to make a scale model of all the compartments on the bottom deck of Noah’s ark. You will need the following items for this fun activity:

  • lots of cardboard (preferably cardboard box lids)
  • packing tape
  • masking tape
  • brown paint
  • popsicle sticks
  • diagonal cutters or butcher knife
  • small plastic animals, 2 of each kind

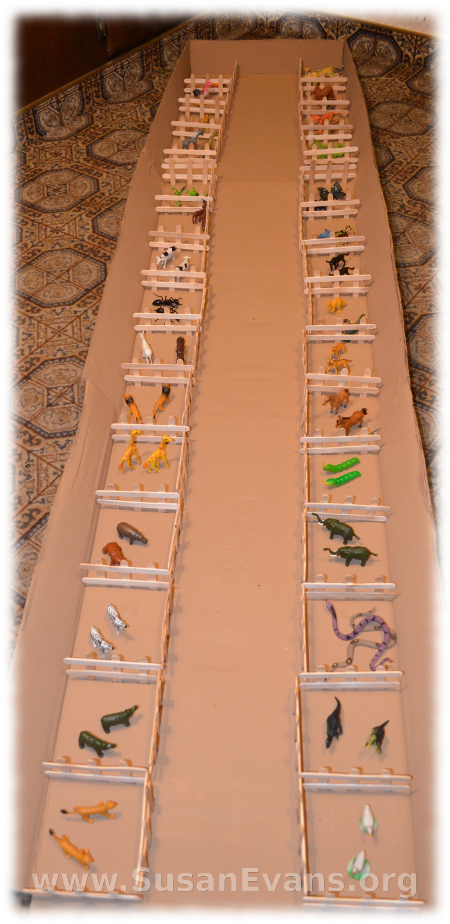
Tape cardboard box lids together, as shown in the video. You can use any pieces of cardboard to create the same shape. Measure one foot across, and 6 feet long. These are the proportions of the ark, since it was 50 cubits wide and 300 cubits long. The ark was larger than a football field, with three decks.

After taping the cardboard together with packing tape for strength, place masking tape on top of it, so that the paint will adhere to it. Now paint the entire model of Noah’s ark whatever shade of brown you want, since nobody knows what color gopher wood was.

model-of-Noah's-ark-2

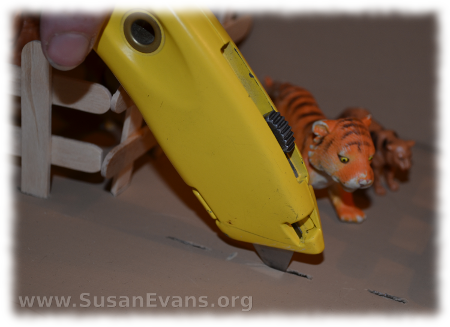
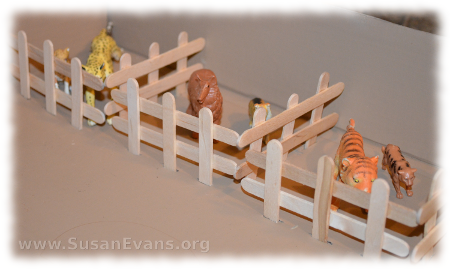
Now have the kids build fences with popsicle sticks, gluing 3 half-pieces to 2 whole sticks. I show you how to do this in the video. Insert the fences into slits that you cut into the bottom of the cardboard. Now place the animals in the ark two by two.

model-of-Noah's-ark-3

The reason God destroyed the earth was that every inclination of men’s hearts was to do evil continually. (Genesis 6:5) This caused God to have great sorrow, because no one on earth cared about having a relationship with Him. Noah was the only exception. God supernaturally saved him with his family by having Noah build an ark. Then God cracked open the foundations of the deep under the earth, and water poured over the earth from below and above. Scholars have conjectured that the continents were all connected until the flood, and that the major earthquakes of the waters under the earth breaking forth caused the present locations of the continents.

Sign up below for a free printable e-book of this Bible crafts series!

If you enjoyed making this model of Noah’s ark, you will love Using Simple Costumes and Props to Teach the Bible. You receive this 2-hour video for free when you sign up for the Unit Study Treasure Vault, which has an enormous Bible section that you will love!