Archive for the ‘Art’ Category

Greek Art for Kids

Monday, December 2nd, 2013

greek-art-for-kids

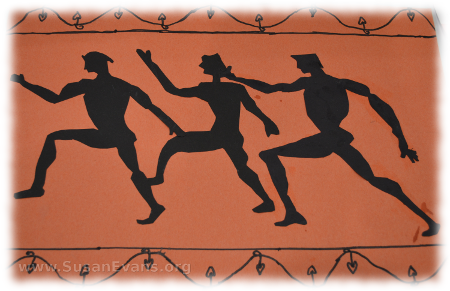
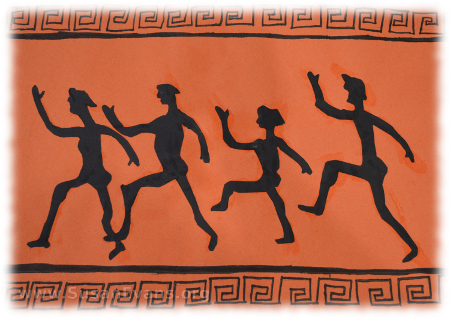
Are you looking for super easy Greek art for kids? This art activity is the easiest I’ve ever seen! I saw this entry at the state fair and decided to do it with my own children. All you need is orange and black construction paper, scissors, and a black marker.

You will use the orange construction paper as the background of your project. We have chosen orange because it looks like the terra cotta pottery from Greece. Now you can cut out shapes of people from the black construction paper. It might be easier to draw the figures in pencil before cutting them out. Make sure the figures all face the same direction.

For the finishing touches, take your black marker and add embellishments and twirls to the top and bottom of your paper. If you need to look at Greek pottery designs, you can look here for inspiration.

If you liked this simple Greek art for kids activity, you will love my free Ancient Greece Unit Study. You might want to subscribe to my YouTube Channel to not miss any upcoming unit study videos.
greek-art-for-kids-2

Fun Art Supply Ideas (Free PDF)

Monday, September 9th, 2013

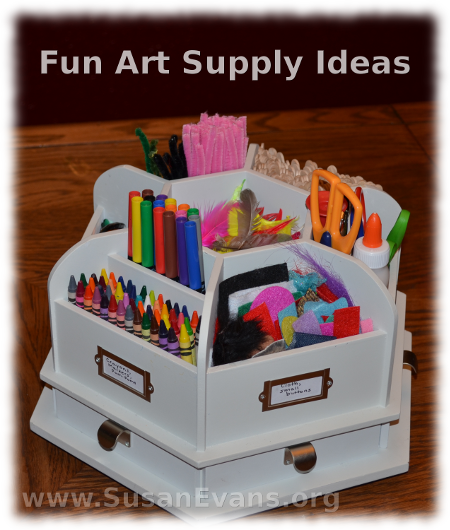
fun-art-supply-ideasHere is a list of fun art supply ideas for making art projects with your children:

  1. Colored pencils
  2. Stapler
  3. School glue
  4. Scissors
  5. Construction paper
  6. Crayons
  7. Markers
  8. Glitter
  9. Tempera paint
  10. Watercolors
  11. Wooden sculpture base
  12. Clay
  13. Chalk
  14. Rubber stamps and ink
  15. Large roll of paper
  16. Yarn
  17. Twine
  18. String
  19. Hole punch
  20. Computer paper
  21. Fake jewels
  22. Buttons
  23. Glass jars
  24. Foil
  25. Pipe cleaners
  26. Hot glue gun
  27. Fabric scraps
  28. Tape
  29. Paper fasteners
  30. Juice lids
  31. Checkbook boxes
  32. Large cardboard boxes
  33. Plaster of Paris
  34. Needle and thread
  35. Sewing Machine
  36. Felt
  37. Gold rope
  38. Velcro
  39. Easel
  40. Card stock paper
  41. Newspaper
  42. Clear contact paper
  43. Fabric glue
  44. Cookie cutters
  45. Stencils
  46. Nature journal
  47. Acrylic paint
  48. Paintbrushes
  49. Tracing paper
  50. Popsicle sticks
  51. Paper bags
  52. Safety pins
  53. Leather scraps
  54. Wood scraps
  55. Drawing pencils
  56. Art eraser
  57. Small seashells
  58. Sand
  59. Scrapbook paper
  60. Small pom poms
  61. Ribbon
  62. Colorful tissue paper
  63. Toothpicks
  64. Hammer and nails
  65. Shoe boxes
  66. Magnetic tape
  67. Small fake ivy
  68. Feathers
  69. Rubber bands
  70. Fabric markers
  71. Florist wire
  72. Oil pastels
  73. Skickers
  74. Mosaic tiles
  75. Art books

Here is a free PDF download of this list:

How do you organize these fun art supplies? I show you one way to organize your art supplies in this 2-minute video. You will see a lot of the art supplies listed above inside this organized contraption:

Why not get a fresh homeschool room makeover? Check it out here.

Creative Ways to Use Cookie Cutters #12: Dolls and Pillows

Friday, May 3rd, 2013

creative-ways-to-use-cookie-cutters-dolls-pillows

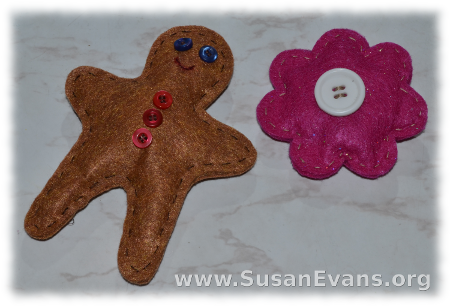
We are counting all the creative ways to use cookie cutters, and we are on #12: Dolls and Pillows! Some cookie cutters lend themselves well to make a felt doll. The gingerbread man cookie cutter is fabulous for this toy. Trace around the cookie cutter on two pieces of brown felt. Cut them out. Decorate the gingerbread man by sewing on button eyes, a red smile stitched on with thread, and three buttons down the front.

Get some filler, either a cotton-like substance, or the scraps of felt that were left over from the brown felt. Stitch the entire gingerbread man, except for one arm. Then put the stuffing into the doll and stitch it shut. This pillow took me 30 minutes only because I was trying to find two matching buttons for the eyes.

This is a perfect simple sewing craft for a child to make, since the stitches just go up and down (a straight stitch). You can also make a pillow from any other shape of cookie cutter. A star pillow would be fun for the Fourth of July, and a maple leaf pillow would be good for the autumn. A clover pillow would be perfect for Saint Patrick’s Day. Smaller pillows make great pin cushions, or they can be used as pillows for dolls.

Cross Mosaic

Friday, March 22nd, 2013

cross-mosaic

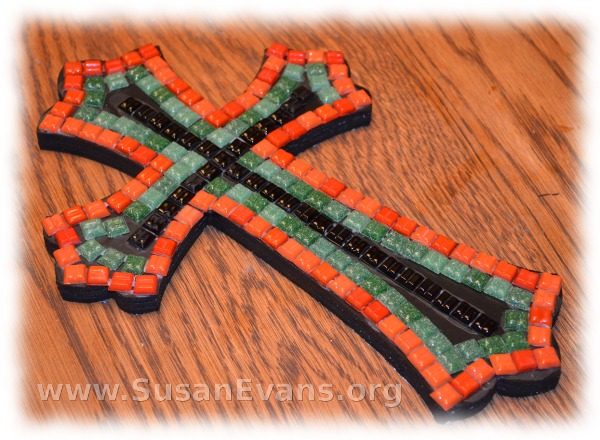
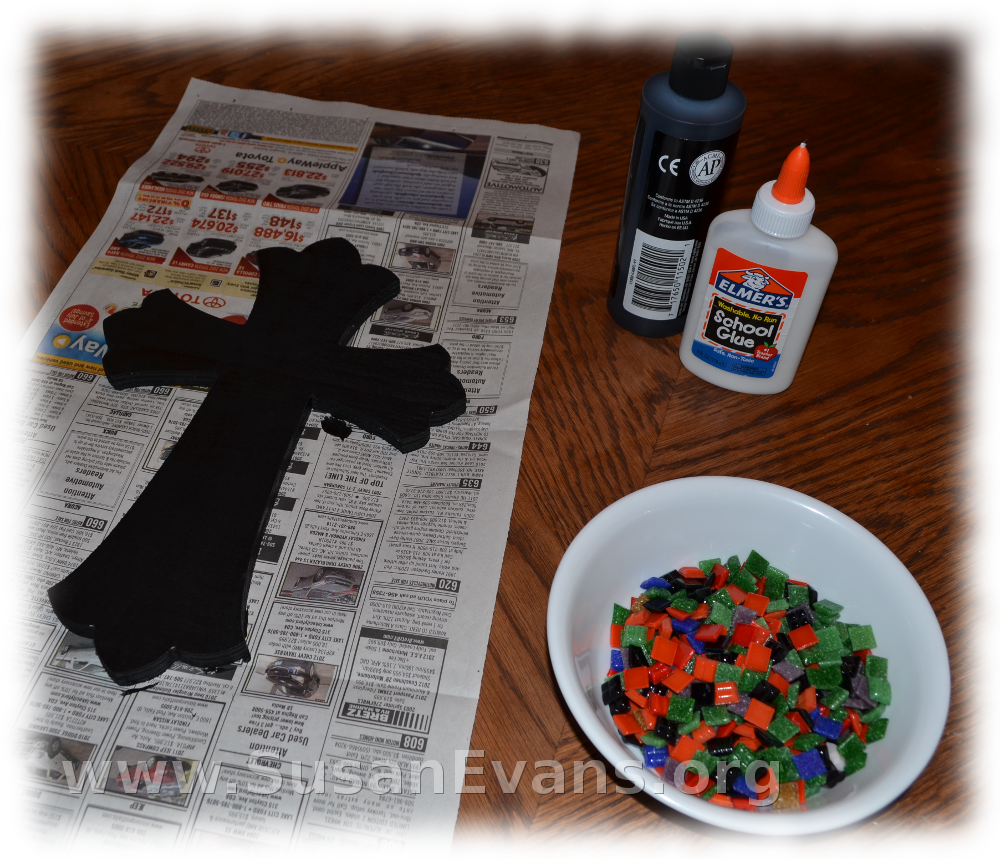
This beautiful cross mosaic is easy and fun to make. You will need the following supplies:

  • wooden cross (buy at craft supply store)
  • mosaic tiles
  • black paint
  • school glue
  • paintbrush
  • newspaper

cross-mosaic-2

First you will want to paint the cross black. Place newspaper under your cross to avoid getting paint on your table. Let the paint dry.

cross-mosaic-3

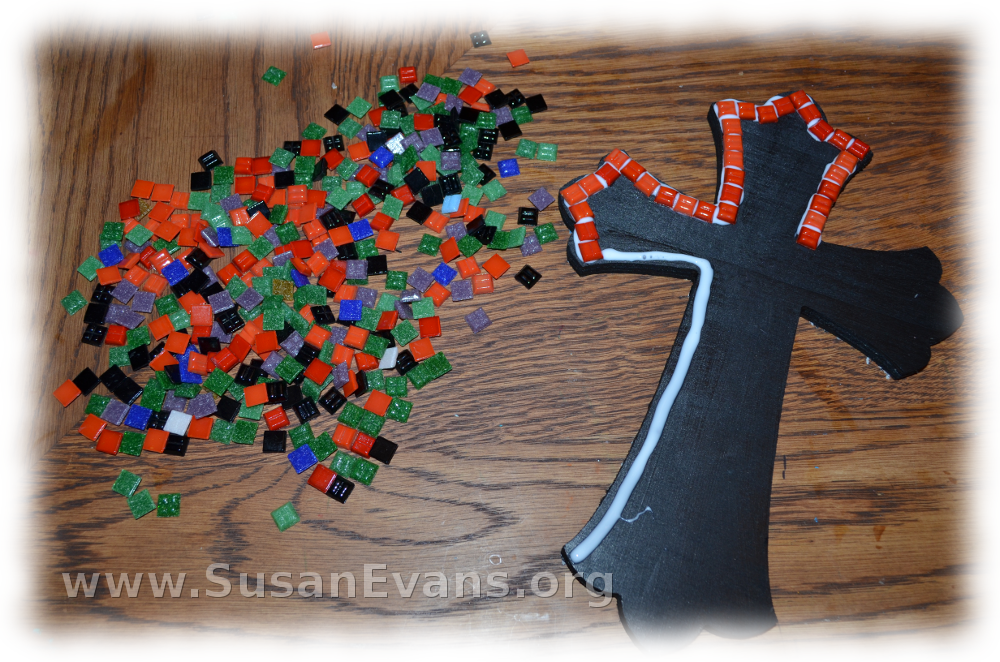
Next you will spill out your tiles. You might want to sort them by color. Get your school glue and make a line with the glue around the edge of the cross. Choose one color to outline the entire edge of the cross. Set the tile into the glue.

cross-mosaic-4

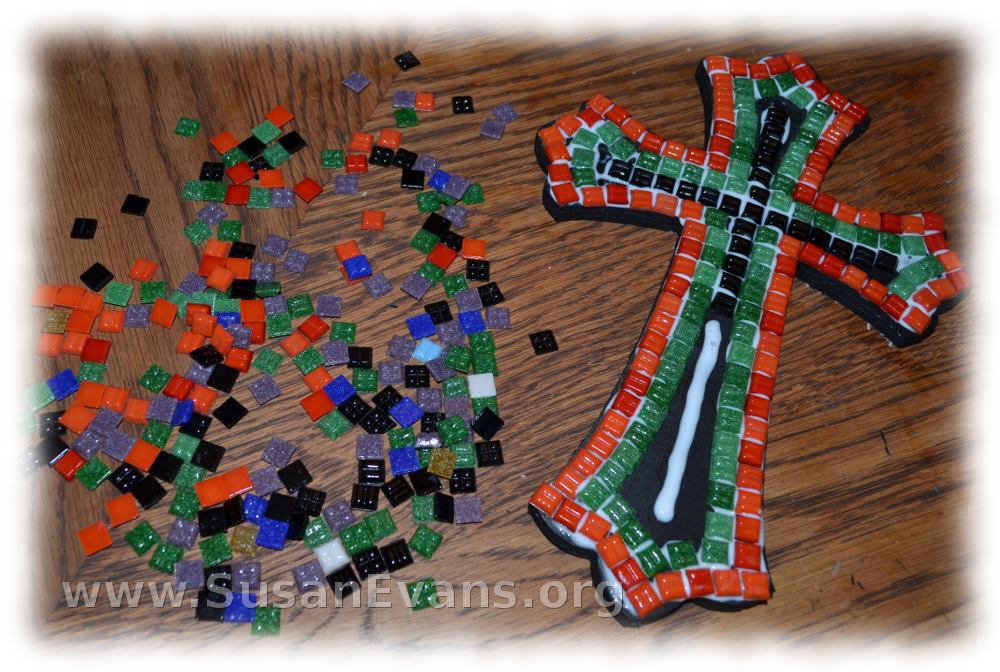
Without waiting for it to dry, make a second row of tiles inside the first row. Decide how you want to arrange your tiles based on how big your cross is. At this point I started gluing down the black cross in the center, since I realized that there was not enough space to put the green tiles all the way around the two arms of the cross. The black line of tiles was more important to me, so I glued that down at the same time I was gluing down the green tiles.

cross-mosaic-5

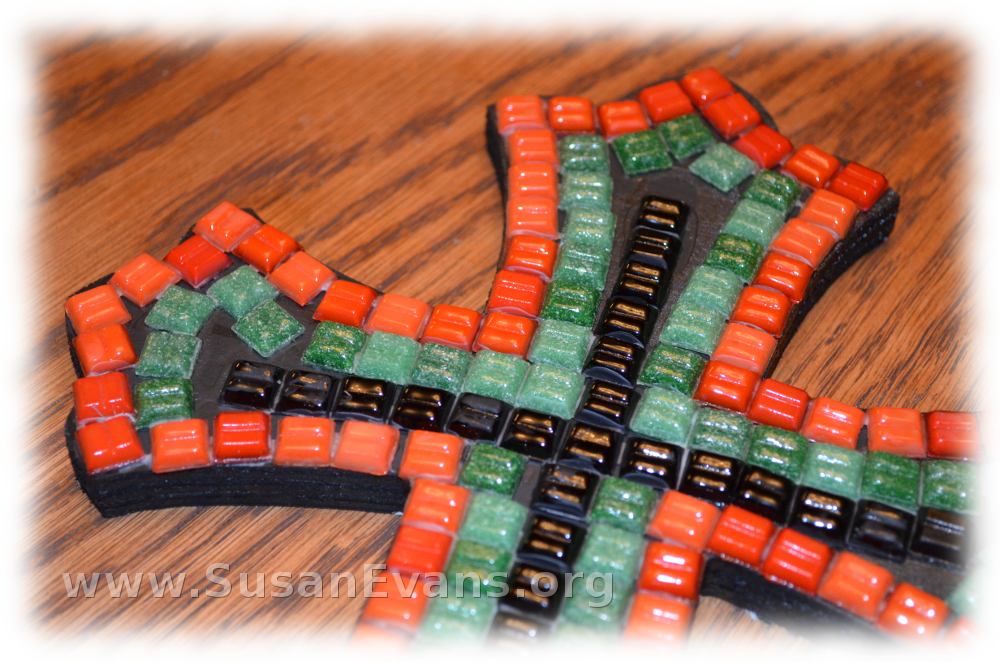
It took me less than half an hour to glue all the tiles, so the glue was wet enough to push the red tiles over slightly to fit in the green and black tiles. After a few hours, the glue dries clear. The cross mosaic is now finished and ready to hang on the wall.

cross-mosaic-6