Posts Tagged ‘Sunday School’

A Farmer Sows Seeds

Thursday, October 24th, 2013

a-farmer-sows-seeds

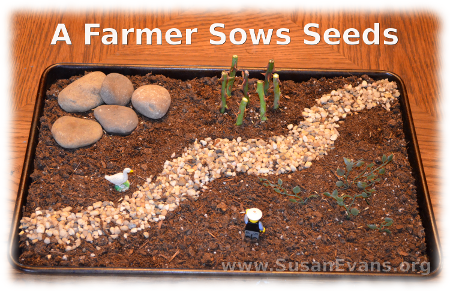
Here is a visual Bible craft to illustrate the story of when a farmer sows seeds. You will find the story in Luke 8:4-15. A farmer sows seeds into four different types of soil: beside the road, among rocks, surrounded by thorns, and in good soil. The seed represents the Word of God. What happens to each seed, and what does each seed represent in our lives, according to Jesus?

  • Beside the road: The seed is trampled, and birds eat it up. These people hear the Word of God, but the devil comes and takes it away, so that they don’t believe and are not saved.
  • Among rocks: The seed withers away because it has no water. These people hear and receive the Word of God with joy, but they have no firm root. They shrivel away when temptation comes.
  • Surrounded by thorns: The seed grows up among thorns, and the thorns choke the young plants. These people are choked by worries, riches, and pleasures, so they never mature.
  • In good soil: The seed grows and produces a crop 100 times as great. These people have held fast to the Word and bear fruit with perseverance.

a-farmer-sows-seeds-2

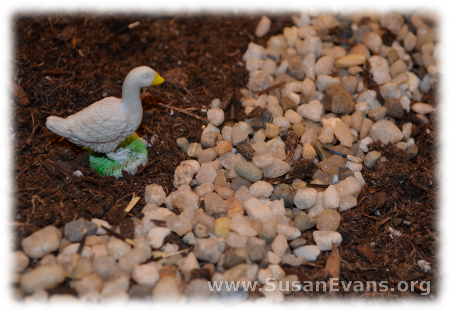
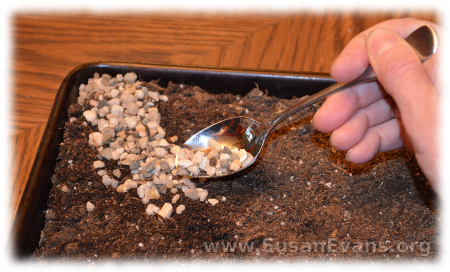
To make this “A Farmer Sows Seeds” craft, you will start with pouring soil on a cookie sheet. Spread pebbles like a winding road across your cookie sheet. I used a spoon to control where the pebbles were going. Place a bird along the side of the road. Then sprinkle some seeds on the road.

a-farmer-sows-seeds-4

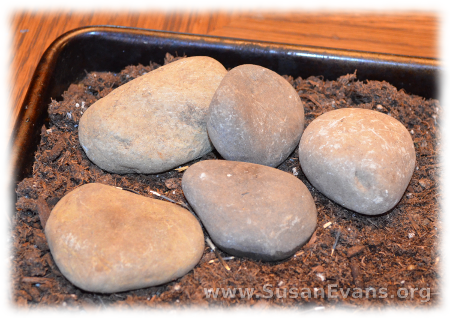
Place some larger rocks in one corner of the cookie sheet. Sprinkle some seeds there.

a-farmer-sows-seeds-3

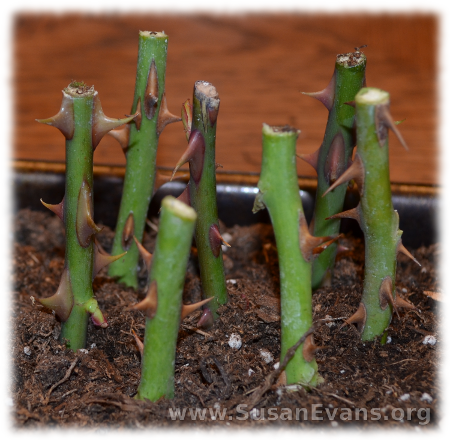
Clip some thorns from your rose bushes outside, and put a small piece of clay on the bottom of each one so they will stand up when you dig a hole and attach the thorn stems directly to the cookie sheet. If you have a deeper cookie sheet, you do not need clay because the stems will stab nicely into the deeper soil. Toss some seeds into the thorns area.

a-farmer-sows-seeds-5

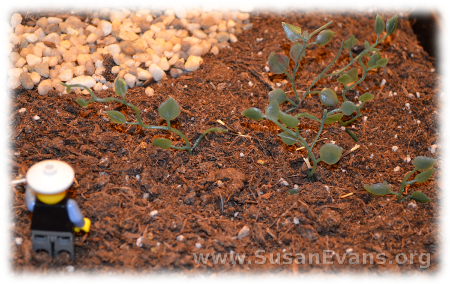
Now get some real or plastic plants that are green, and place them into the good soil. Sprinkle seeds there. The farmer should be placed into the soil as well. We used a Lego man, and my son stuffed some seeds into his hand.

a-farmer-sows-seeds-6

After making the craft, you can tell your kids the story, and this visual reminder will help them to remember the story. Hopefully they will take the story to heart and make sure the soil of their hearts receive the Word of God and persevere in growing closer to God each day!

Sign up below for a free printable e-book of this Bible crafts series!

If you enjoyed making this Bible craft of “A Farmer Sows Seeds”, you will love Using Simple Costumes and Props to Teach the Bible. You receive this 2-hour video for free when you sign up for the Unit Study Treasure Vault, which has an enormous Bible section!
Prophetic Statue from Daniel

Saturday, October 19th, 2013

prophetic-statue-from-Daniel-1

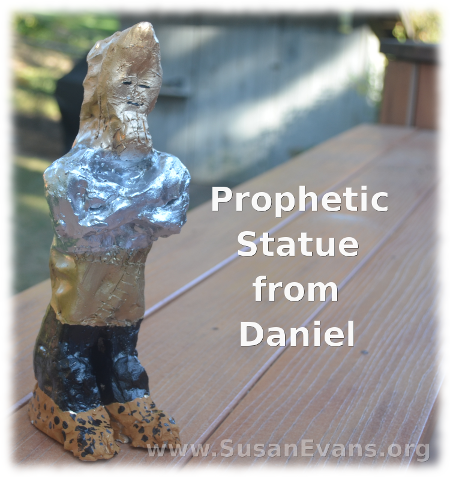
To understand the prophecies of the different nations that would rule after Babylon, you can make a prophetic statue from Daniel with your children. Teach your children about history and how God’s prophecies always come true. The head of the statue was gold, representing Babylon. The chest was silver, representing the Medo-Persian Empire that conquered Babylon the same night that the writing on the wall happened. The Greek Empire was represented by brass, and Alexander the Great conquered all the known world at the time. Then the Roman Empire came next, which was represented by iron. This was during the time that Jesus was born. The Holy Roman Empire followed, which had clay mixed with iron, and that kingdom would eventually crumble because it had weaknesses, being too spread out.

To make this prophetic statue from Daniel, you will need the following items:

  • white self-hardening clay
  • a plastic placemat for underneath
  • a clay sculpting tool (or a table knife)
  • paint and paintbrush (or spray paint) in gold, silver, bronze, black, and dark red

prophetic-statue-from-Daniel-2

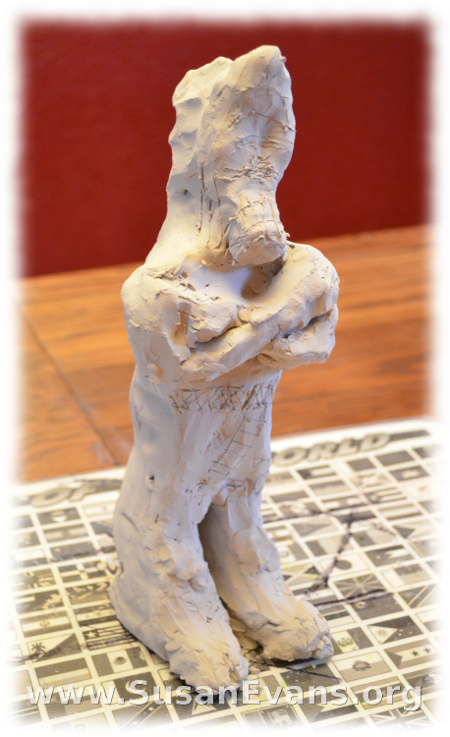
Grab a hunk of clay and mold it into the shape of a Persian man with folded arms. Let the clay dry for a few days.

prophetic-statue-from-Daniel-4

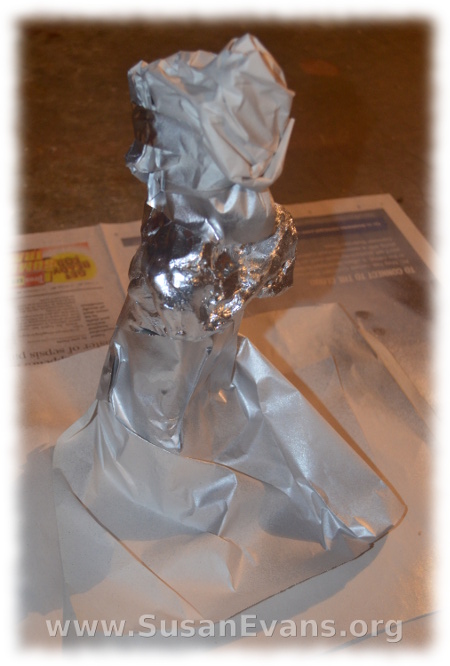
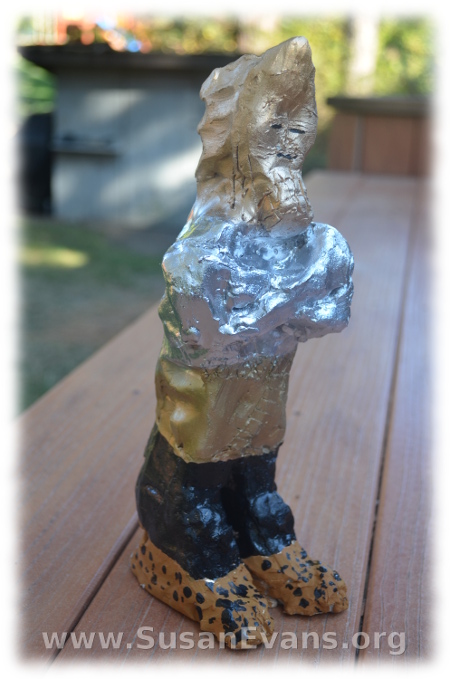
Spray paint the entire statue gold (or paint it on with a brush). The next day, cover the head of the statue and the waist down. Tape the paper in place before you spray paint the chest silver. You don’t need to cover the statue if you are brushing it on by hand, which is what I did with the other colors. Use a brass-colored paint for the lower torso, and black paint for the legs. Then paint the feet a reddish clay color. Let that dry, and then dot it with black. The feet were supposed to be clay mixed with iron.

Your prophetic statue from Daniel is now complete, and you can use it to teach children about this prophecy given to King Nebuchadnezzar from the Babylonian Empire. Daniel interpreted the dream. All these prophecies came to pass, just as the Lord predicted through this dream.

prophetic-statue-from-Daniel-5

Sign up below for a free printable e-book of this Bible crafts series!

If you enjoyed making this prophectic statue from Daniel, you will love Using Simple Costumes and Props to Teach the Bible. You receive this 2-hour video for free when you sign up for the Unit Study Treasure Vault, which has an enormous Bible section that you will love!

Daniel and the Lion’s Den

Friday, October 18th, 2013

Daniel-and-the-lion's-den

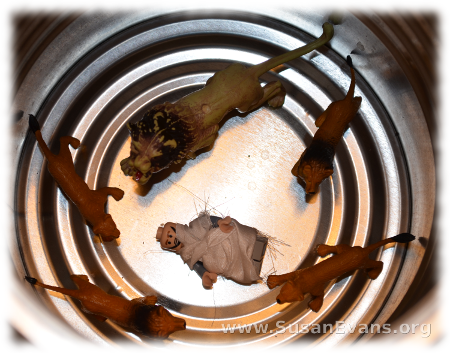
When you teach the story of Daniel and the Lion’s Den to children, you can make this easy craft. You will need a coffee can, small plastic lions, and a Lego man. You will also need a hot glue gun and a strip of white cloth.

Plug in the hot glue gun. Open the coffee can and arrange the lions down in there. Grab the Lego man and the strip of white cloth (about an inch wide and 8 inches long), tying the cloth around the Lego man like a Bible-time tunic. Hot glue the end down. (If you don’t have a hot glue gun, you could sew the end of the cloth strip down on the back.) Now place your Daniel character into the lion’s den.

No, wait a minute! You need to throw the Daniel character into the lion’s den, telling the kids that evil men threw Daniel into the lions just because he was praying to God three times a day. Those evil men couldn’t find a single thing wrong with Daniel because he was a man of integrity, always doing what was right.

The lions did not eat Daniel. An angel of the Lord shut their mouths, even though the lions were hungry. The next morning King Darius asked Daniel if he was okay, and King Darius was overjoyed to find out that God had saved Daniel from death. He took Daniel out of the pit and threw the evil men into it, and the ravenous lions ate them all.

So I suppose you could throw more Lego men into the bucket, then slam the lid down, and shake the bucket. I know… gruesome, huh? But these men conspired to murder an innocent man, so what goes around comes around. God controls the universe, not man.

Sign up below for a free printable e-book of this Bible crafts series!

If you enjoyed this “Daniel and the Lion’s Den” Bible story, you will love Using Simple Costumes and Props to Teach the Bible. You receive this 2-hour video for free when you sign up for the Unit Study Treasure Vault, which has an enormous Bible section that you will love!

Ezekiel’s Scroll

Wednesday, October 16th, 2013

Ezekiel's-Scroll

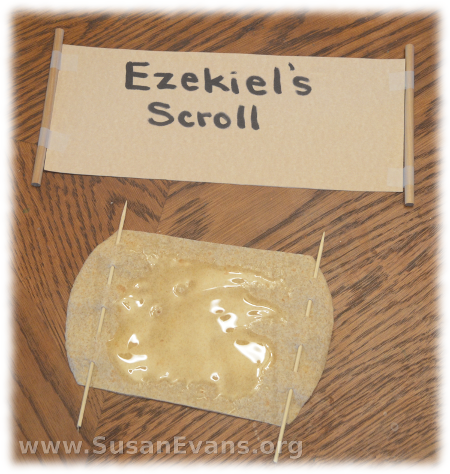
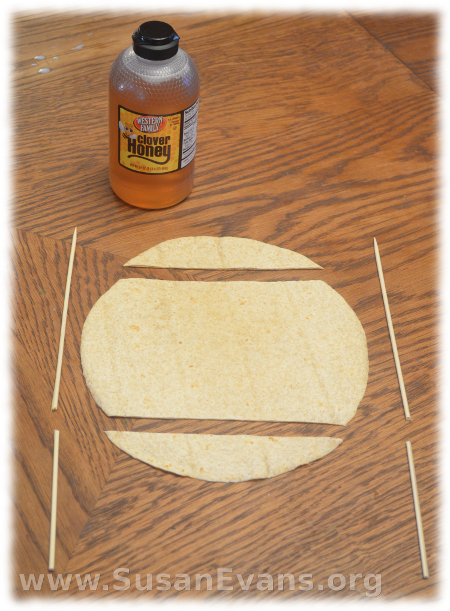
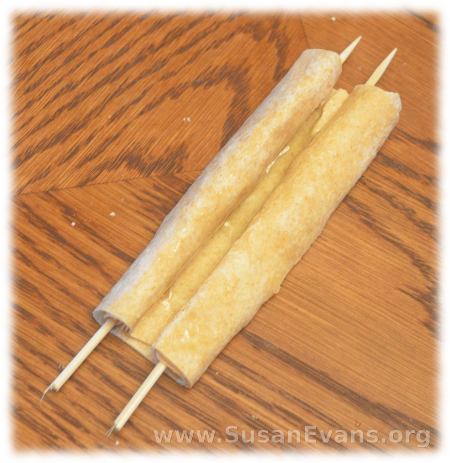
When you are studying the book of Ezekiel with your kids, why not make Ezekiel’s scroll? God commanded Ezekiel to eat the scroll, so we are going to make this scroll craft edible. You will need a soft wheat tortilla, 2 bamboo skewers, scissors, and some honey. Cut the top and bottom off the tortilla with a pair of scissors. Snap the bamboo skewers to the right size, depending on how big your tortilla is.

Ezekiel's-Scroll-2

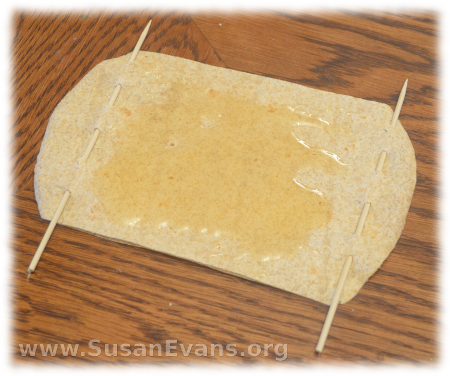
Now thread the skewers in and out of the tortilla on either side. Spread some honey on the inside of the tortilla. In Psalm 19:10, David says that God’s Word is sweeter than honey. This is a great illustration for children, so that they can taste how sweet the Word of God is.

Ezekiel's-Scroll-4

You can roll up the two sides if you want to close the scroll. Make sure the tortilla is not stale, or this will not work. I suppose that if you put a stale tortilla into the microwave, it might not break when you are rolling it. Otherwise buy the tortillas on the same day you make this project.

Ezekiel's-Scrool-3

In Ezekiel chapter 2, God tells Ezekiel to eat the scroll, and inside the scroll is lamentations, mourning, and woe because the people of Israel are rebellious. Nine times God says that the people are rebellious, stubborn, and obstinate. Then God shows Ezekiel visions of the end times. He also sees visions of heaven that are glorious. Ezekiel is my favorite book of the Old Testament because of these heavenly visions.

Sign up below for a free printable e-book of this Bible crafts series!

If you enjoyed making Ezekiel’s scroll, you will love Using Simple Costumes and Props to Teach the Bible. You receive this 2-hour video for free when you sign up for the Unit Study Treasure Vault, which has an enormous Bible section that you will love!